


If you have ever wondered how to make false ceiling design work in a real Indian home — what the installer does on day one, why the process takes several days, what can go wrong later, and how to keep the ceiling looking new for years — this guide answers it in plain language. It is written for homeowners in India: people who are about to get a ceiling installed and want to supervise the work intelligently, and people who already have one and want to look after it.
One honest note before we start: installing a false ceiling is professional work, not a weekend project. This article describes what a good installer does, stage by stage, so you know what to expect and what to check. It does not teach you to do the work yourself — particularly the electrical parts, which belong to a licensed electrician. If you have not chosen a design yet, start with our main false ceiling design guide and come back when you are ready to build it.
Before the first screw: planning and site preparation
Good ceilings are decided on paper before anything is fixed to your slab. A reliable installer will not start drilling on day one; they will start with measurements and decisions. Here is what the planning stage covers, and what you should confirm as the homeowner.
Finalise the design and the lighting plan together
The ceiling design and the lighting plan are one decision, not two. Every recessed light, cove strip, fan point, and AC vent has a fixed position, and those positions decide where the framework can and cannot go. Decide the positions of lights, fans, AC points, and sensors before the ceiling is closed, and think at the same time about how those parts will be reached for maintenance later — lighting fixed after the boards are up leads to awkward cut-outs and rework.
Decide the ceiling height (the “drop”)
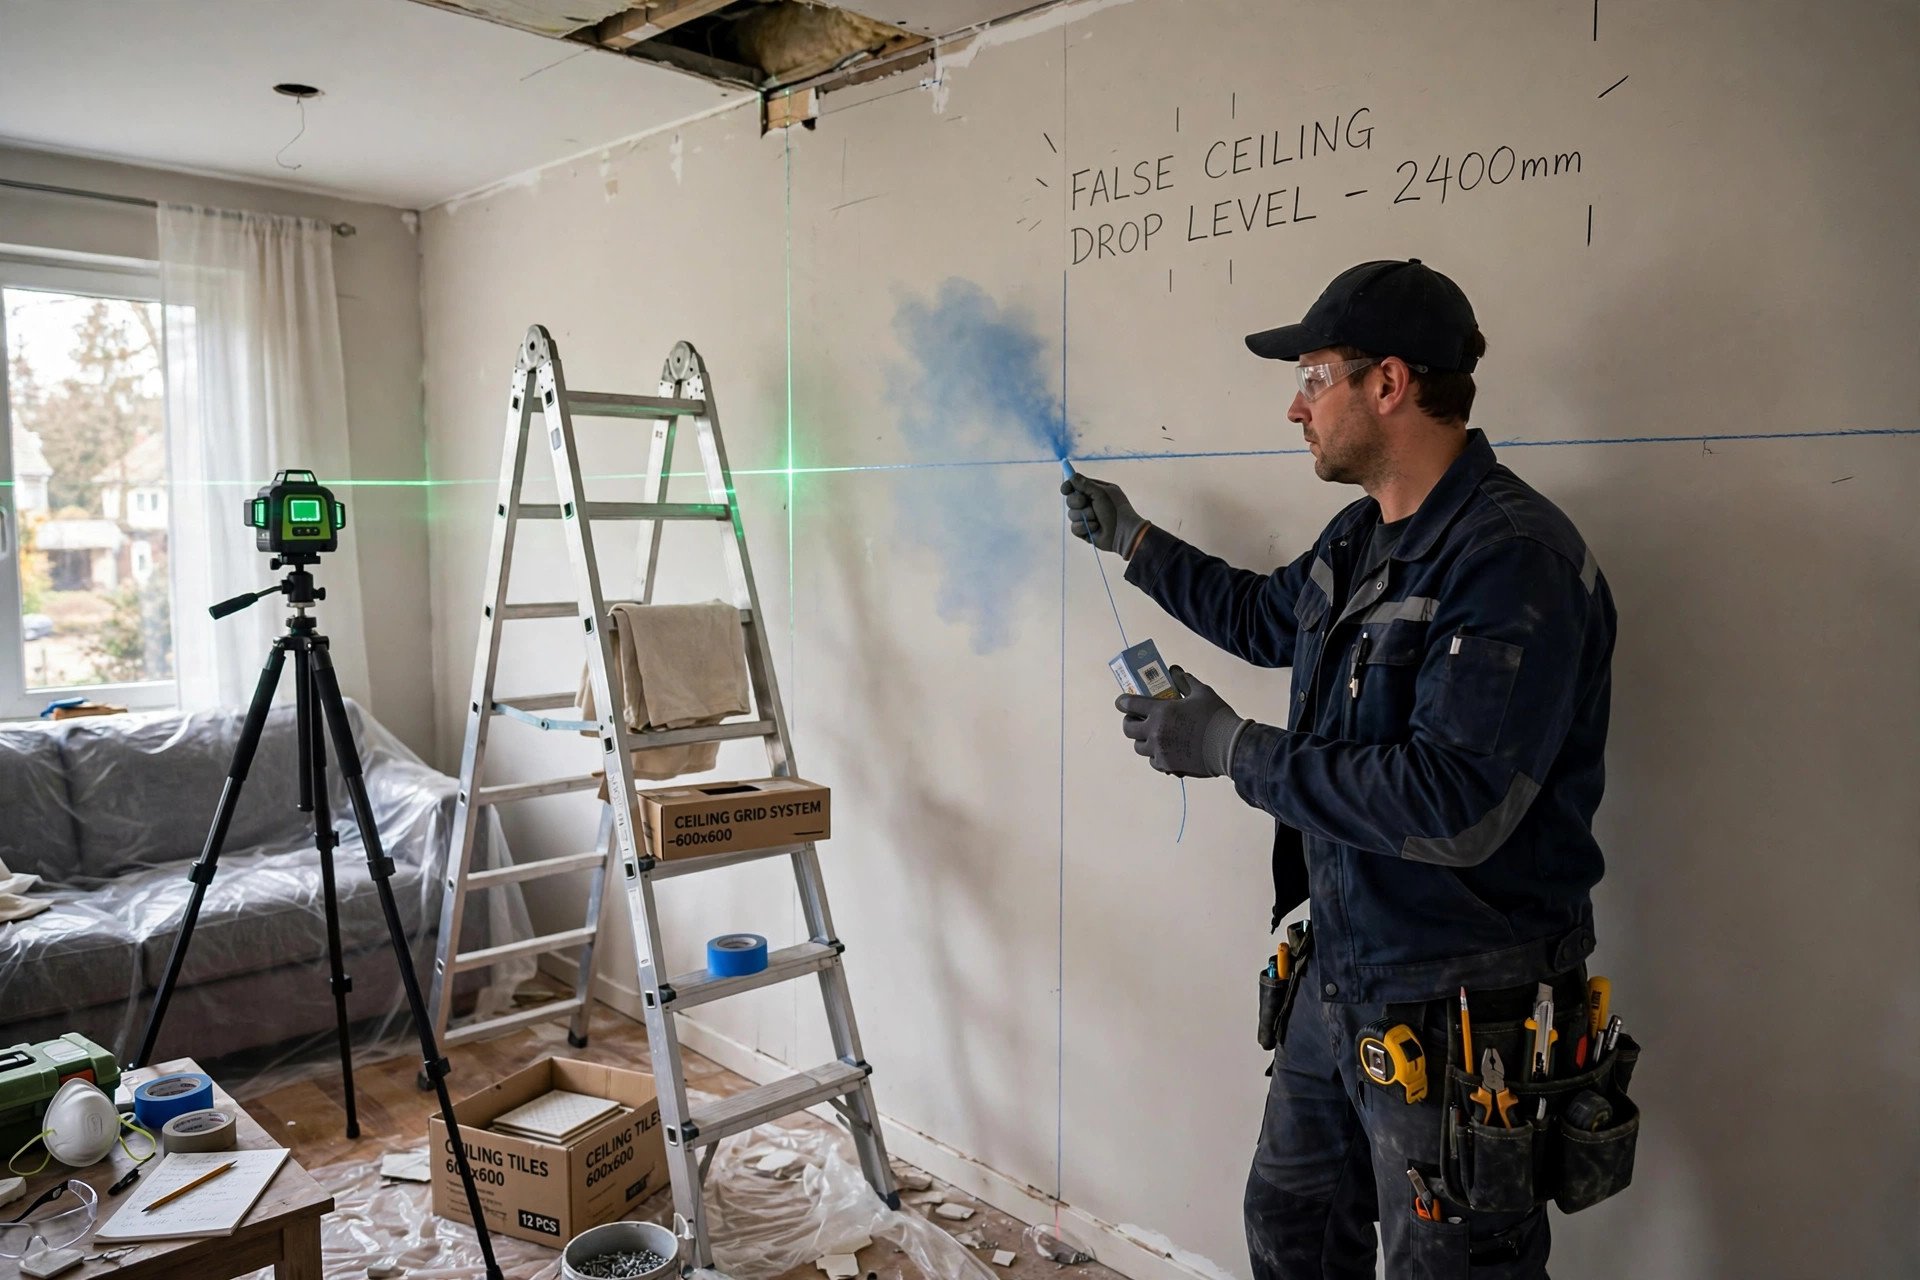
The installer marks a level line around all the walls — usually with a chalk line transferred from a water level or laser — and everything hangs from that line. A smaller drop keeps the room feeling tall; a deeper drop suits layered designs, cove lighting, or hiding bulky ducts. Walk the room and check the marked line feels right before work proceeds, because changing it later means redoing the framework.
Get the services above the ceiling finished first
Electrical wiring, plumbing lines, AC drain pipes, and any other services that will live above the ceiling should be laid and tested before the framework starts, so the ceiling is never opened again for something that could have been done earlier. If you live under a terrace, make sure the roof waterproofing is sound first — a false ceiling is not a waterproof barrier, and water reaching it causes stains, sagging, and damage to the wiring hidden inside.
Check what your quotation actually includes
A per-square-foot rate tells you very little on its own. Ask for an itemised quotation covering the board or panel material, the metal framework, labour, joint treatment, putty, primer and paint, electrical wiring and fixtures if included, cut-outs for lights, access panels, and taxes. Anything missing from that list tends to appear as an extra charge later. For a detailed walkthrough of cost components, see our false ceiling cost guide for India.
Material delivery and storage
Boards should arrive dry and undamaged, and be stored flat, off the floor, in a dry part of the house until they are fixed. Boards left leaning against a damp wall or lying on a wet floor can warp or soften before installation even begins. A careful crew checks the boards on delivery and rejects damaged ones.
Tools and materials a professional crew carries
You do not need to buy any of this, but knowing the kit helps you judge the team that shows up. A standard toolkit includes a measuring tape and pencil, a chalk line, a drill machine, screwdrivers and screws, a spirit level, a utility knife, and a ladder or scaffolding. Expect the crew to wear gloves, eyewear, and masks while cutting gypsum, POP, or PVC — and to sheet up the room’s furniture against dust.

The materials depend on the system you chose. A gypsum ceiling uses factory-made gypsum boards fixed to a galvanised metal framework; POP is mixed and shaped on site over a framework; PVC uses interlocking panels; wood and metal systems use their own planks or tiles. Gypsum is the commonest choice for modern Indian homes because it gives a smooth finish and installs relatively fast, while POP is the choice when the design needs curves and intricate moulding — though it demands genuinely skilled hands and fares worse in damp areas.
The installation sequence, stage by stage
Here is what happens, in order, on a typical gypsum or POP ceiling. PVC and metal tile ceilings follow the same logic with their own fixing details.
Stage 1 — Marking the level lines
The crew transfers the agreed ceiling height to every wall using a water level or laser, then snaps chalk lines around the room’s perimeter. These lines are the reference for everything that follows — if they are not level, nothing built on them will be level either.
Stage 2 — Fixing the perimeter frame
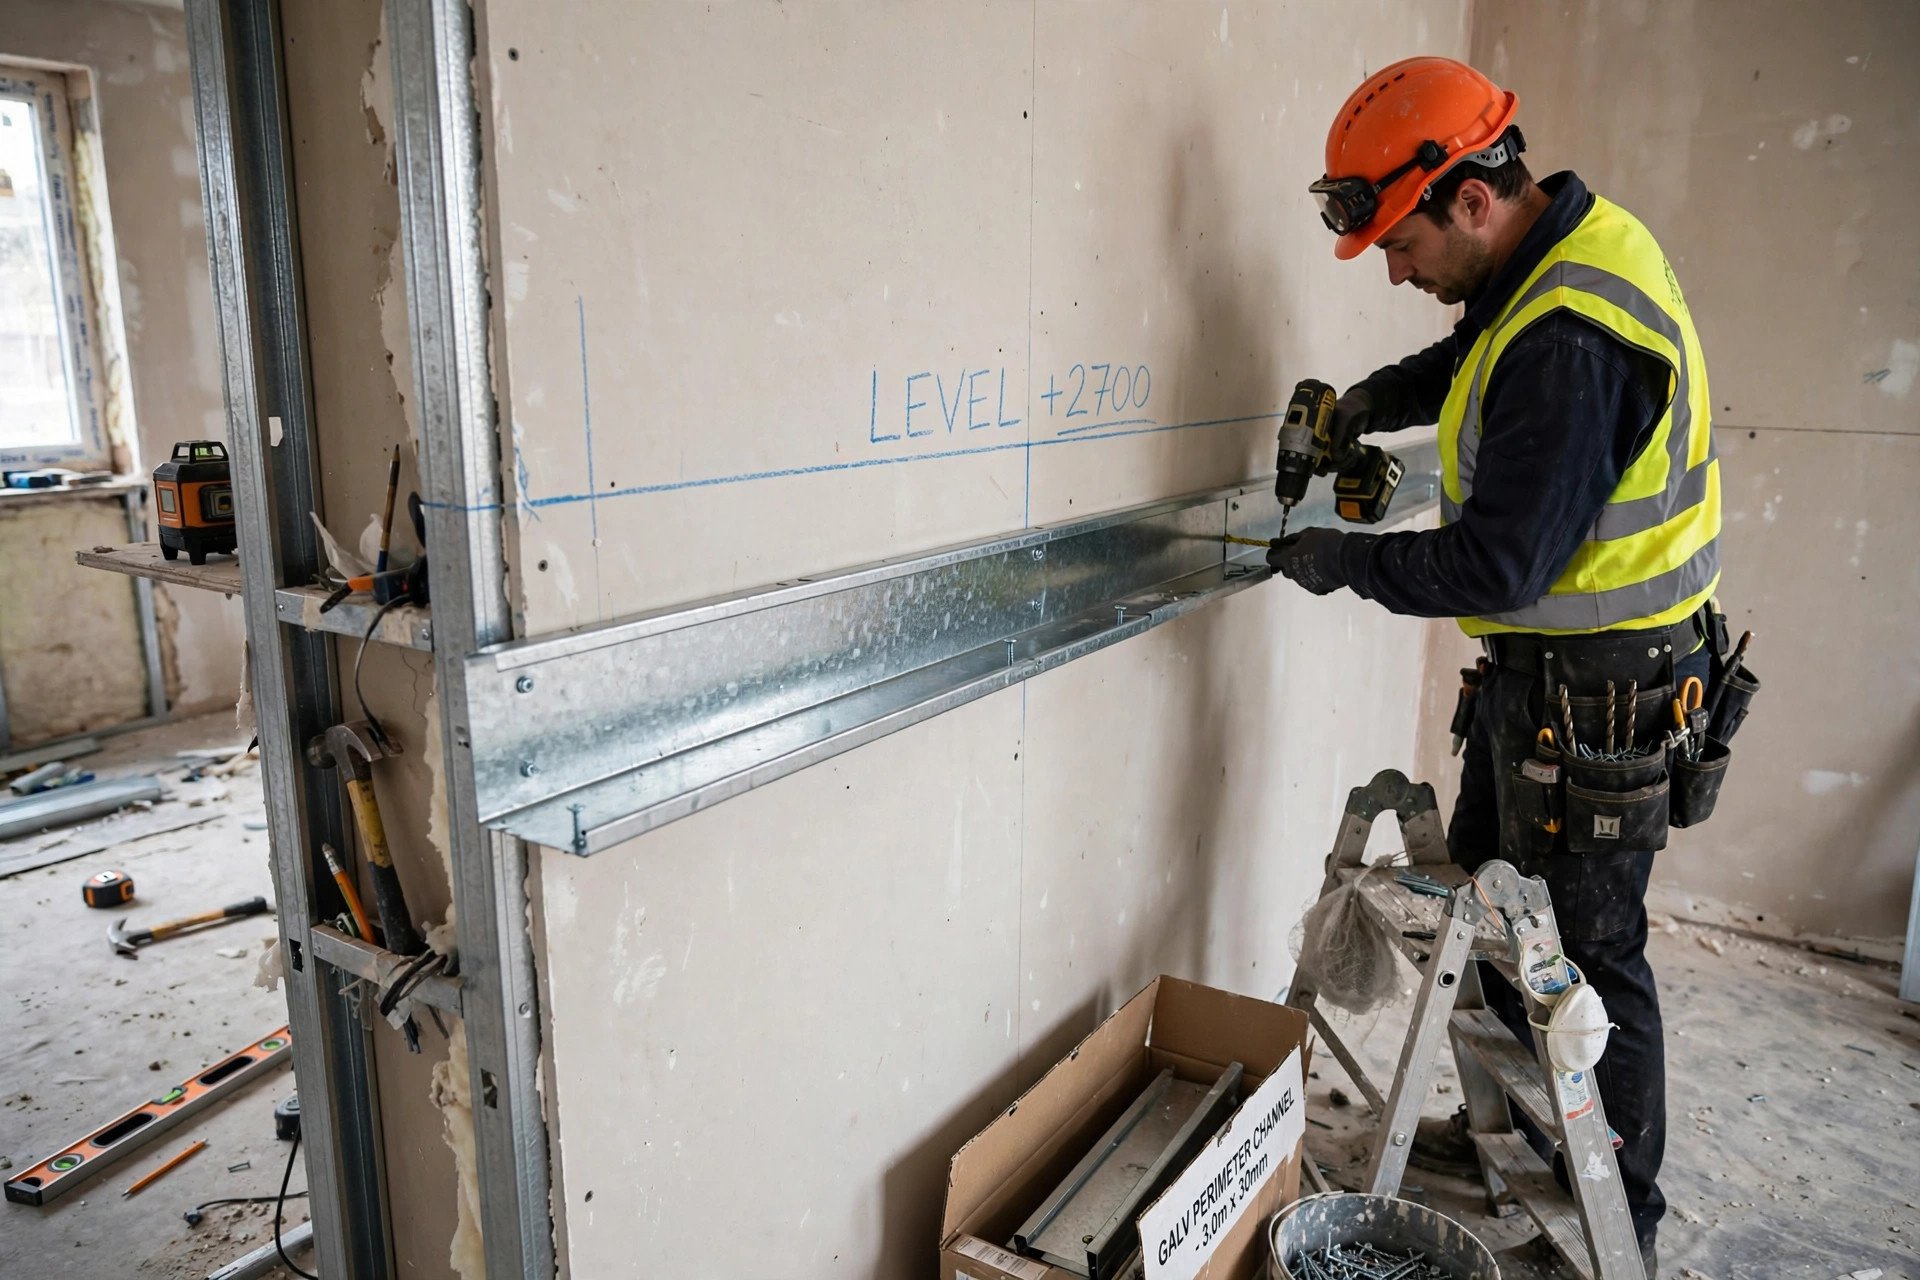
Metal perimeter channels are fixed along the marked lines on all walls. They carry the edges of the ceiling and give the framework its outline — a wavy perimeter here shows up as a wavy ceiling edge in the finished room.
Stage 3 — Hanging the suspension framework
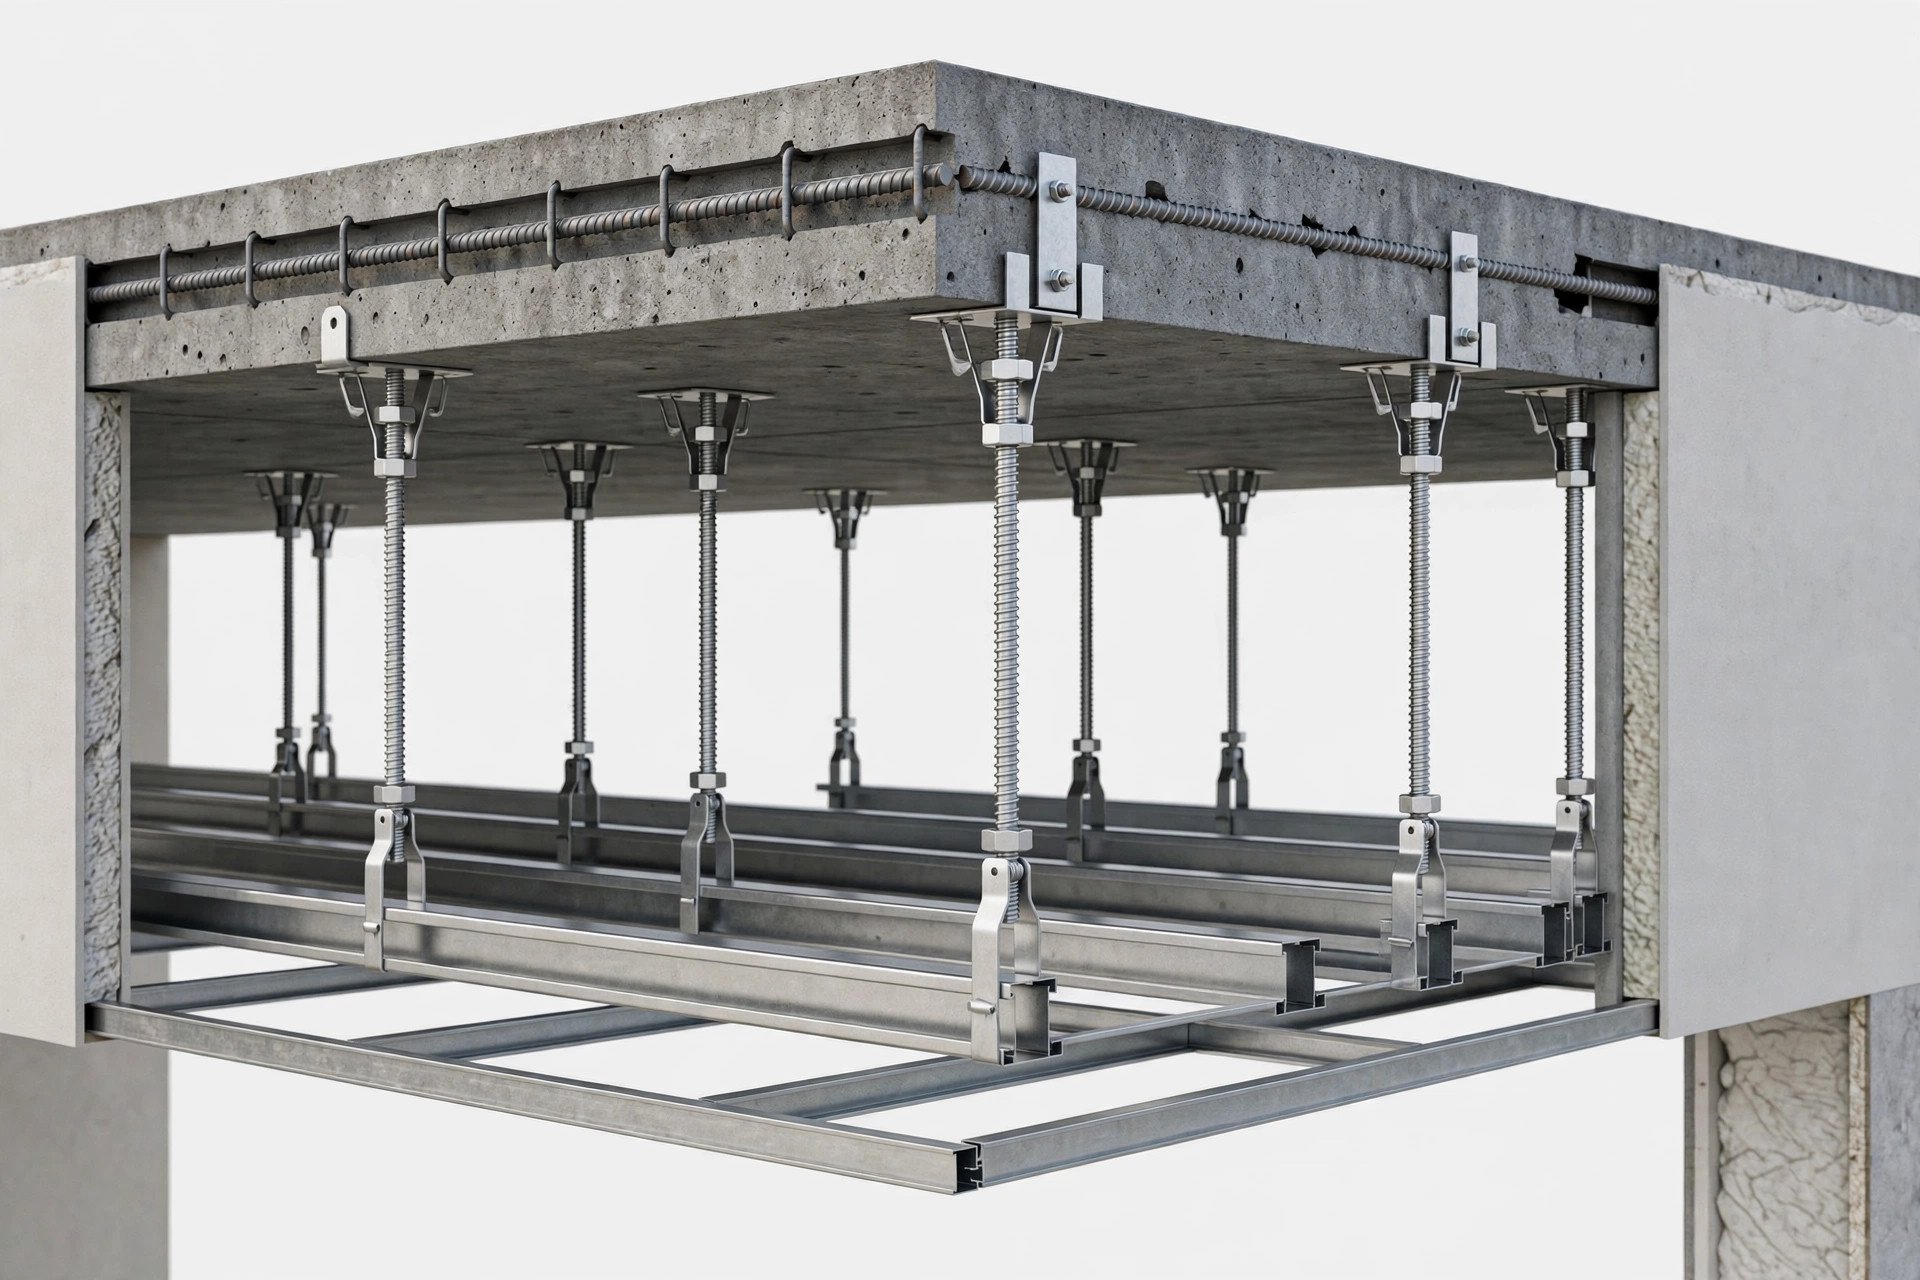
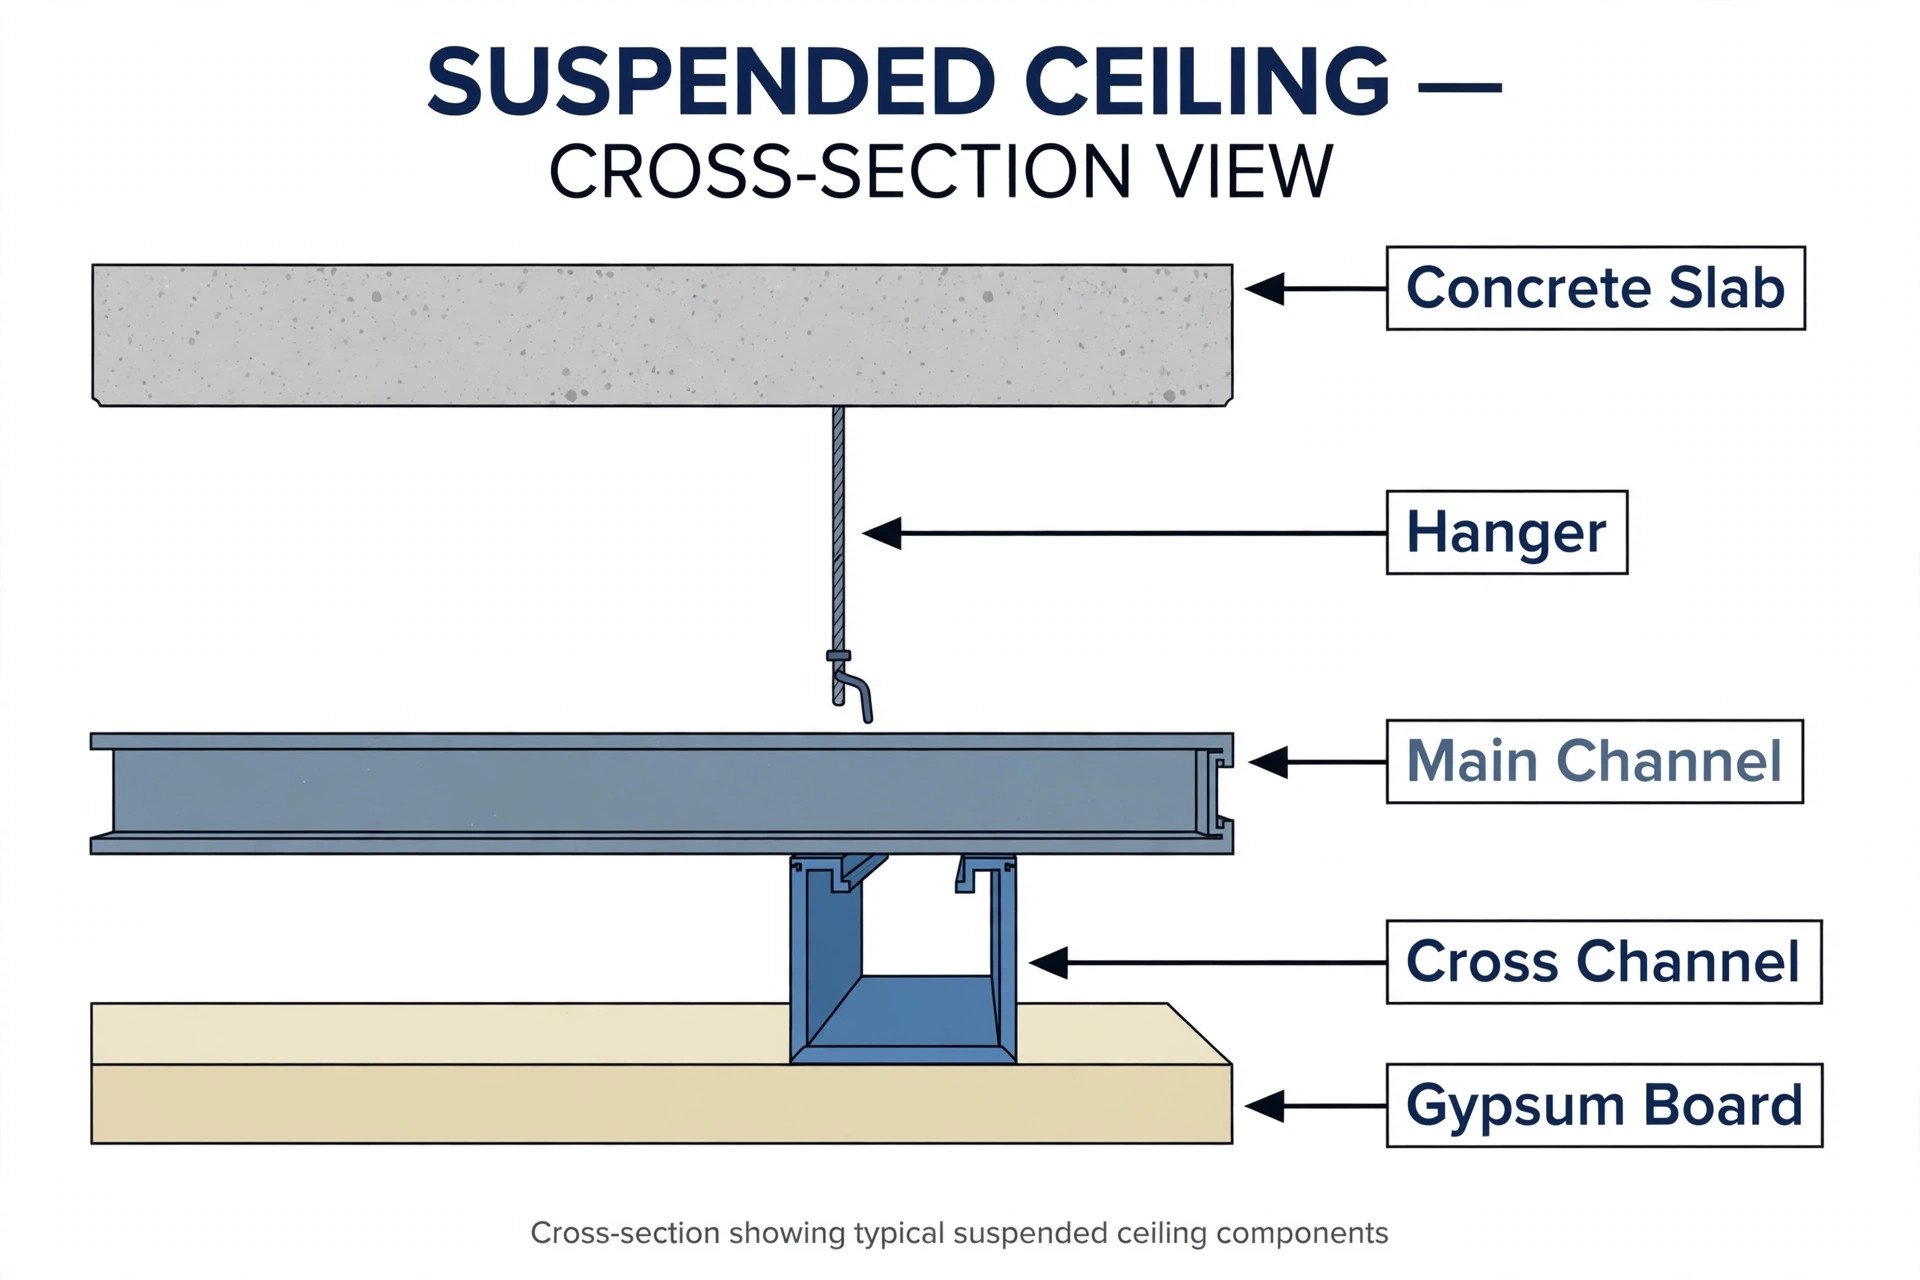
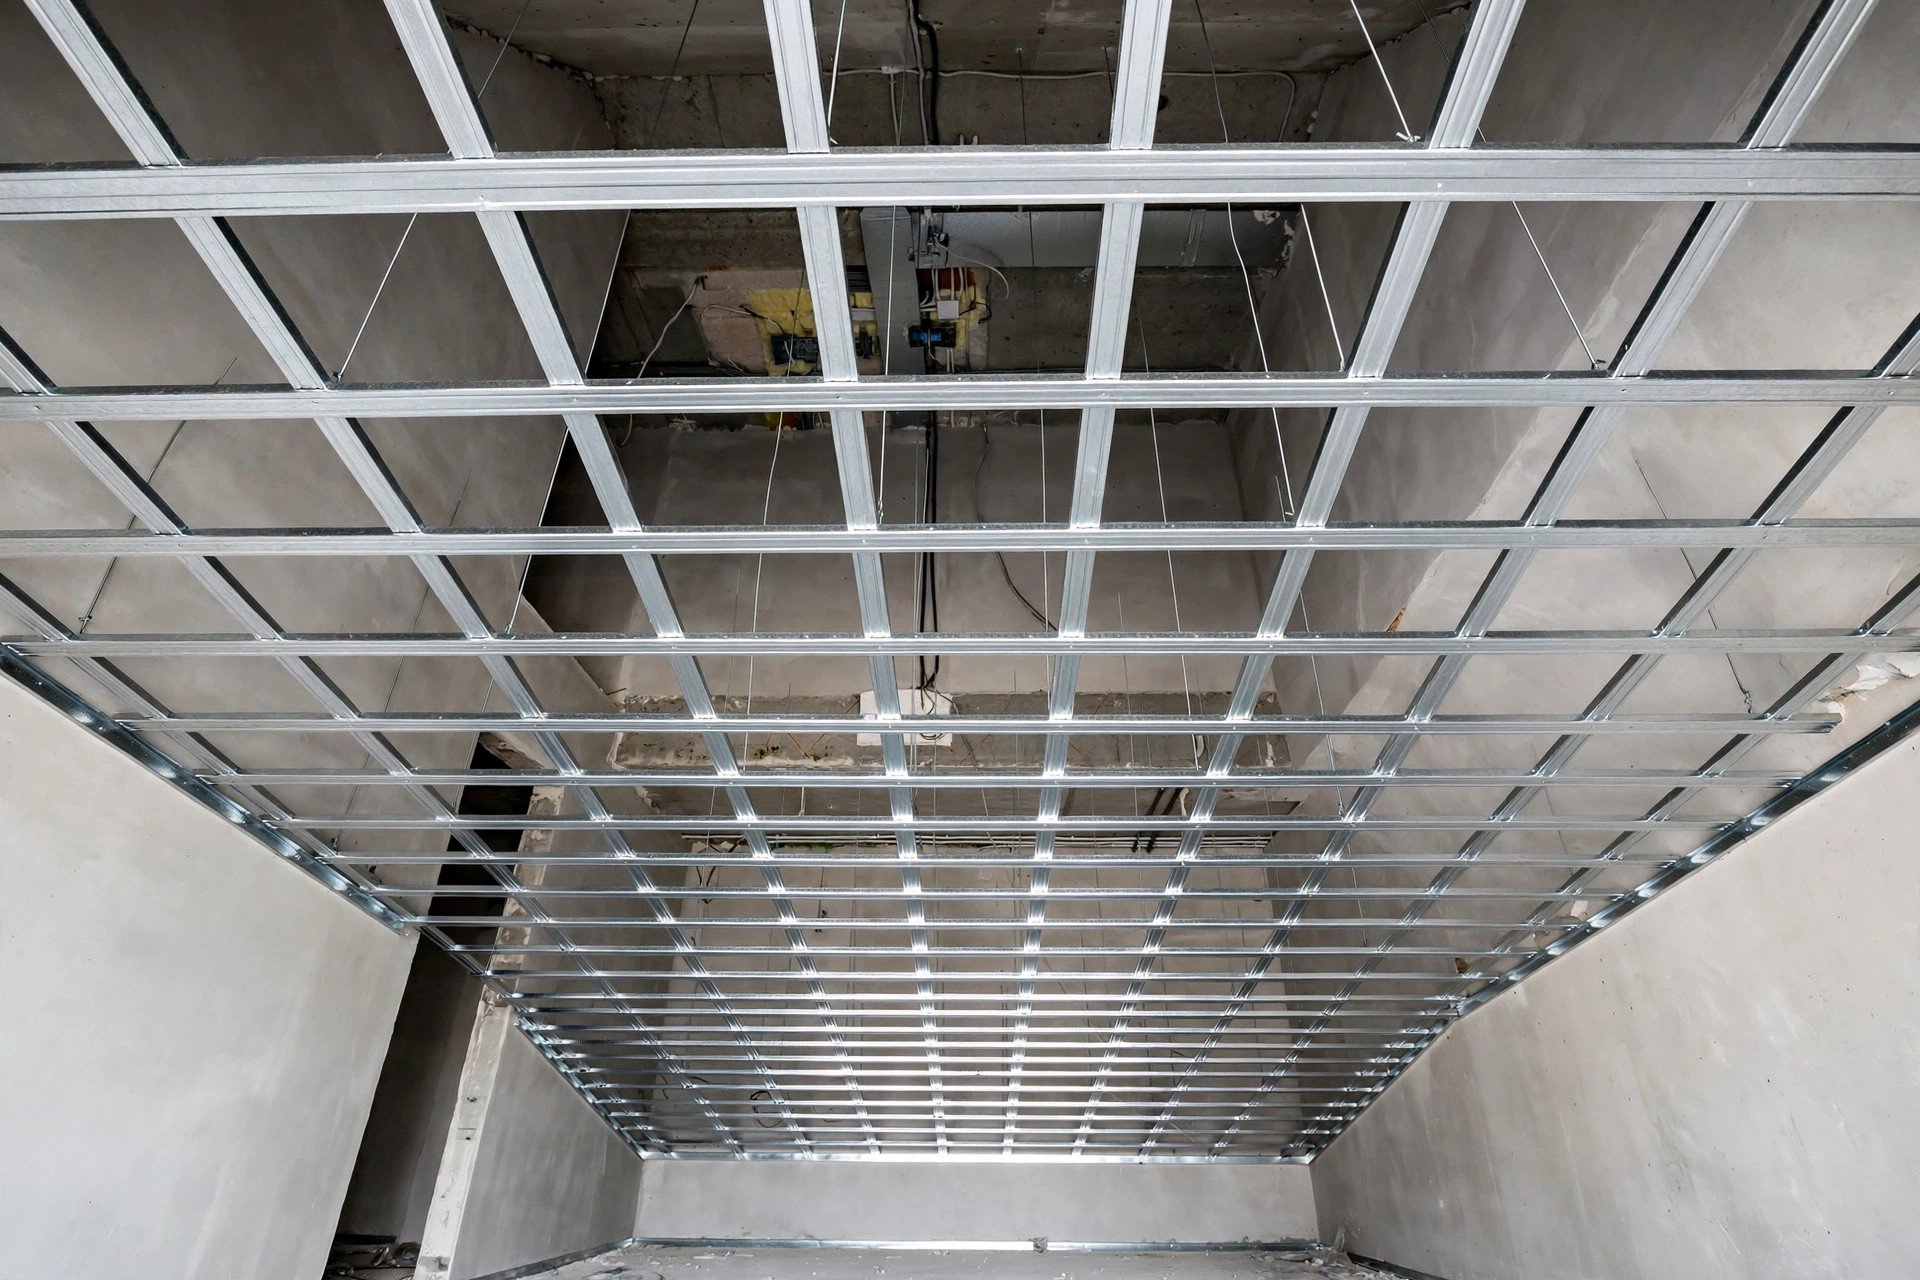
This is the skeleton of the ceiling. Fasteners are fixed into the structural slab above, hangers drop from them, and the main channels are suspended from the hangers at the marked level. The crew checks the level of the whole grid as it goes — a grid that is true now means a flat, crack-free ceiling later. This stage decides the ceiling’s ability to carry its own weight plus its light fixtures, which is why it should never be rushed or improvised.
Stage 4 — Cross channels and the grid
Cross channels are fixed across the main channels to complete a rigid grid, giving every board edge something solid to fix to. The crew re-checks the entire frame for line and level before any board goes up — once boards are fixed, correcting a dip means opening the ceiling again.
Stage 5 — Fixing the boards or panels
Gypsum boards are cut to size, lifted into place, and screwed to the framework with the joints staggered so no long continuous seam runs across the ceiling. Screws are driven just flush — driven too deep, they break the board’s paper face and weaken the fixing; left proud, they show through the finish. For gypsum ceiling designs, this is the stage where the room starts looking like the drawing.

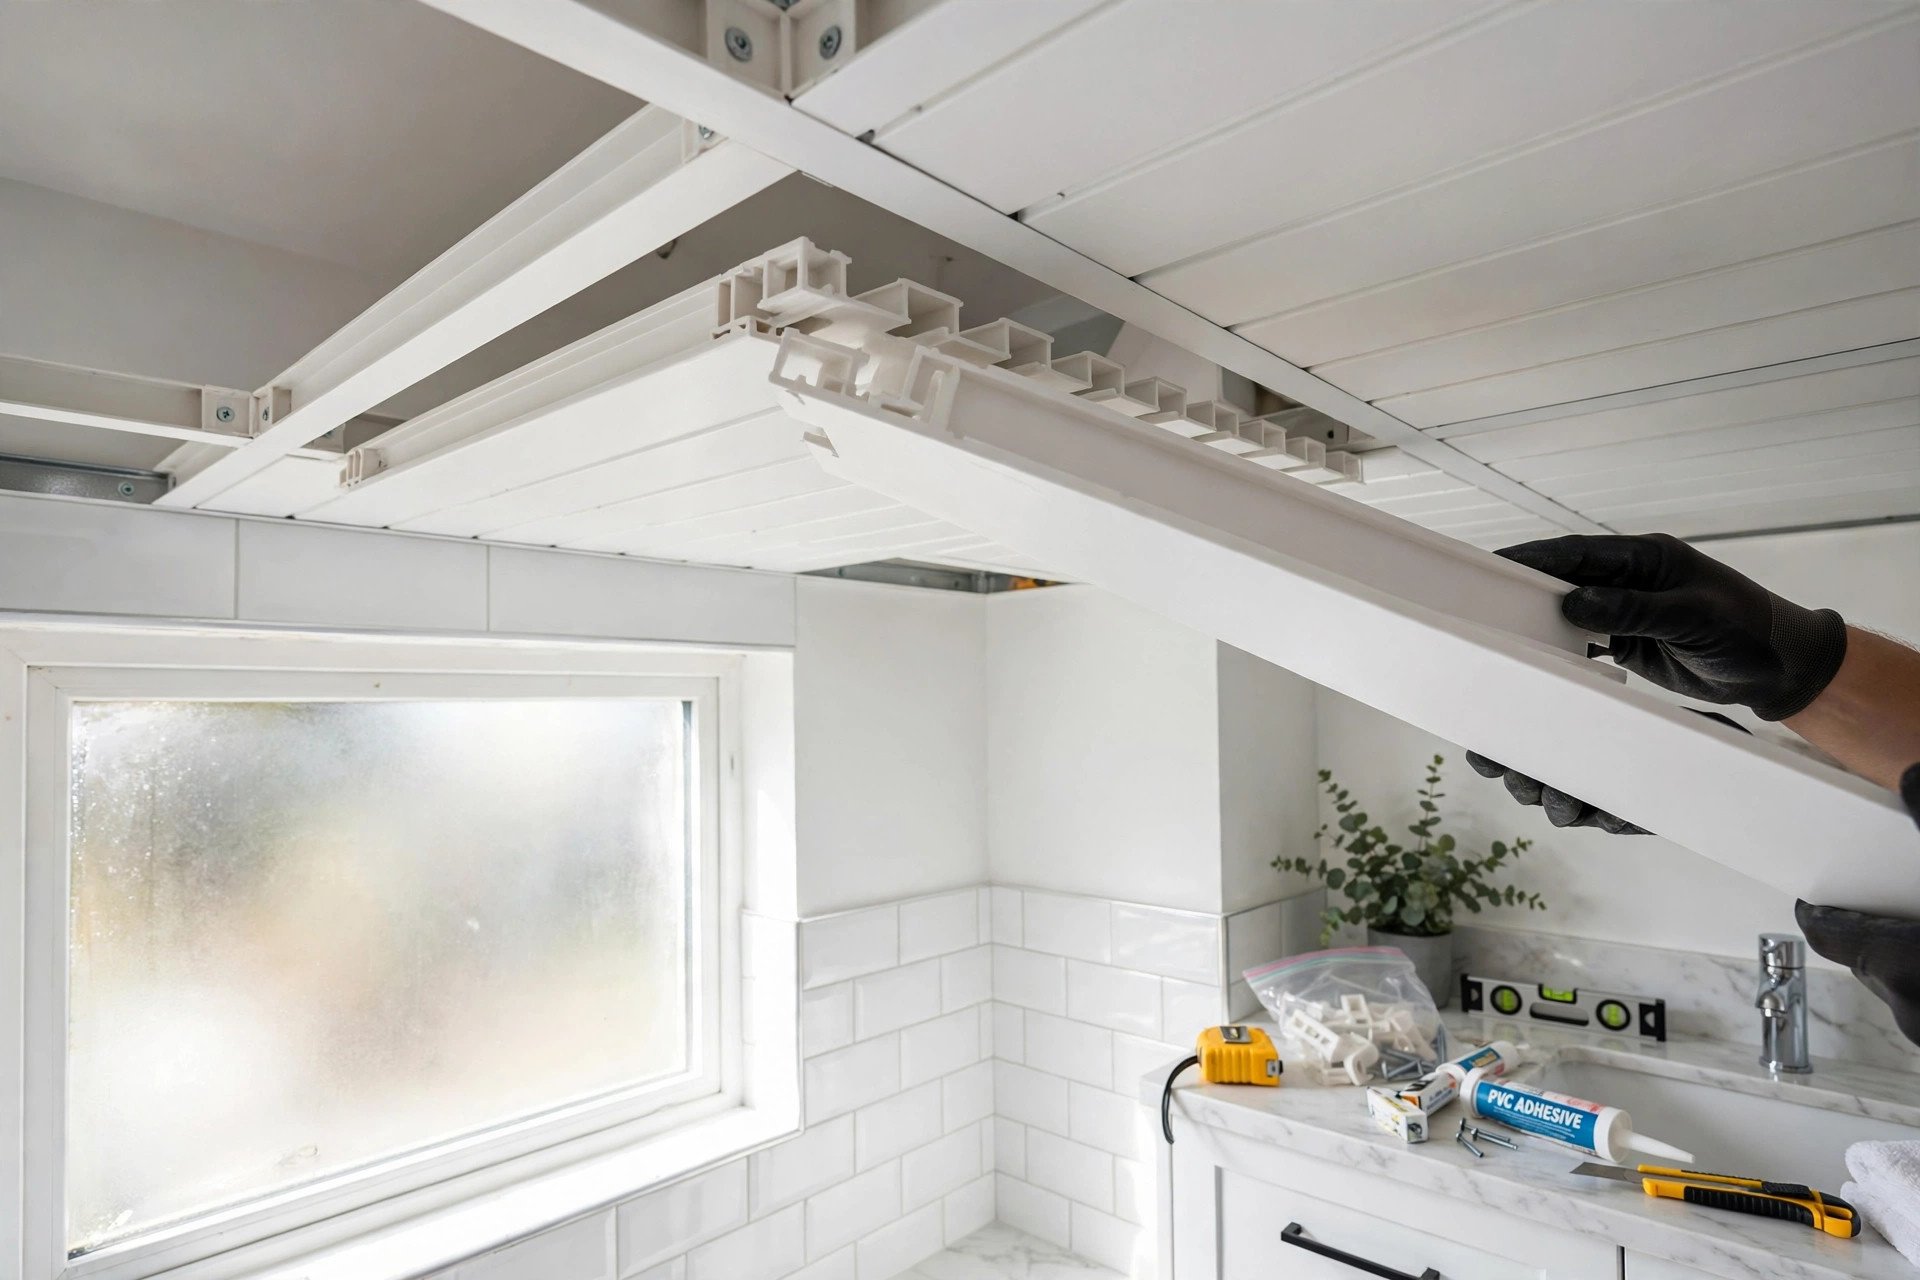
PVC ceilings work differently: interlocking panels click into their own framing and need no jointing or painting, which is part of why they suit bathrooms and utility areas. POP ceilings skip boards entirely — plaster is applied over a mesh fixed to the framework and shaped by hand, slower but capable of the curves and mouldings that make POP popular for decorative designs.

Stage 6 — Joint treatment
On a gypsum ceiling, every seam between boards is taped and filled with jointing compound, usually in two or three thin layers, each feathered wider than the last and allowed to dry between coats. This unglamorous step is where finish quality is won or lost: rushed jointing is the usual reason a ceiling shows lines or cracks along the seams a year later.

Stage 7 — Cut-outs for lights, vents, and access panels
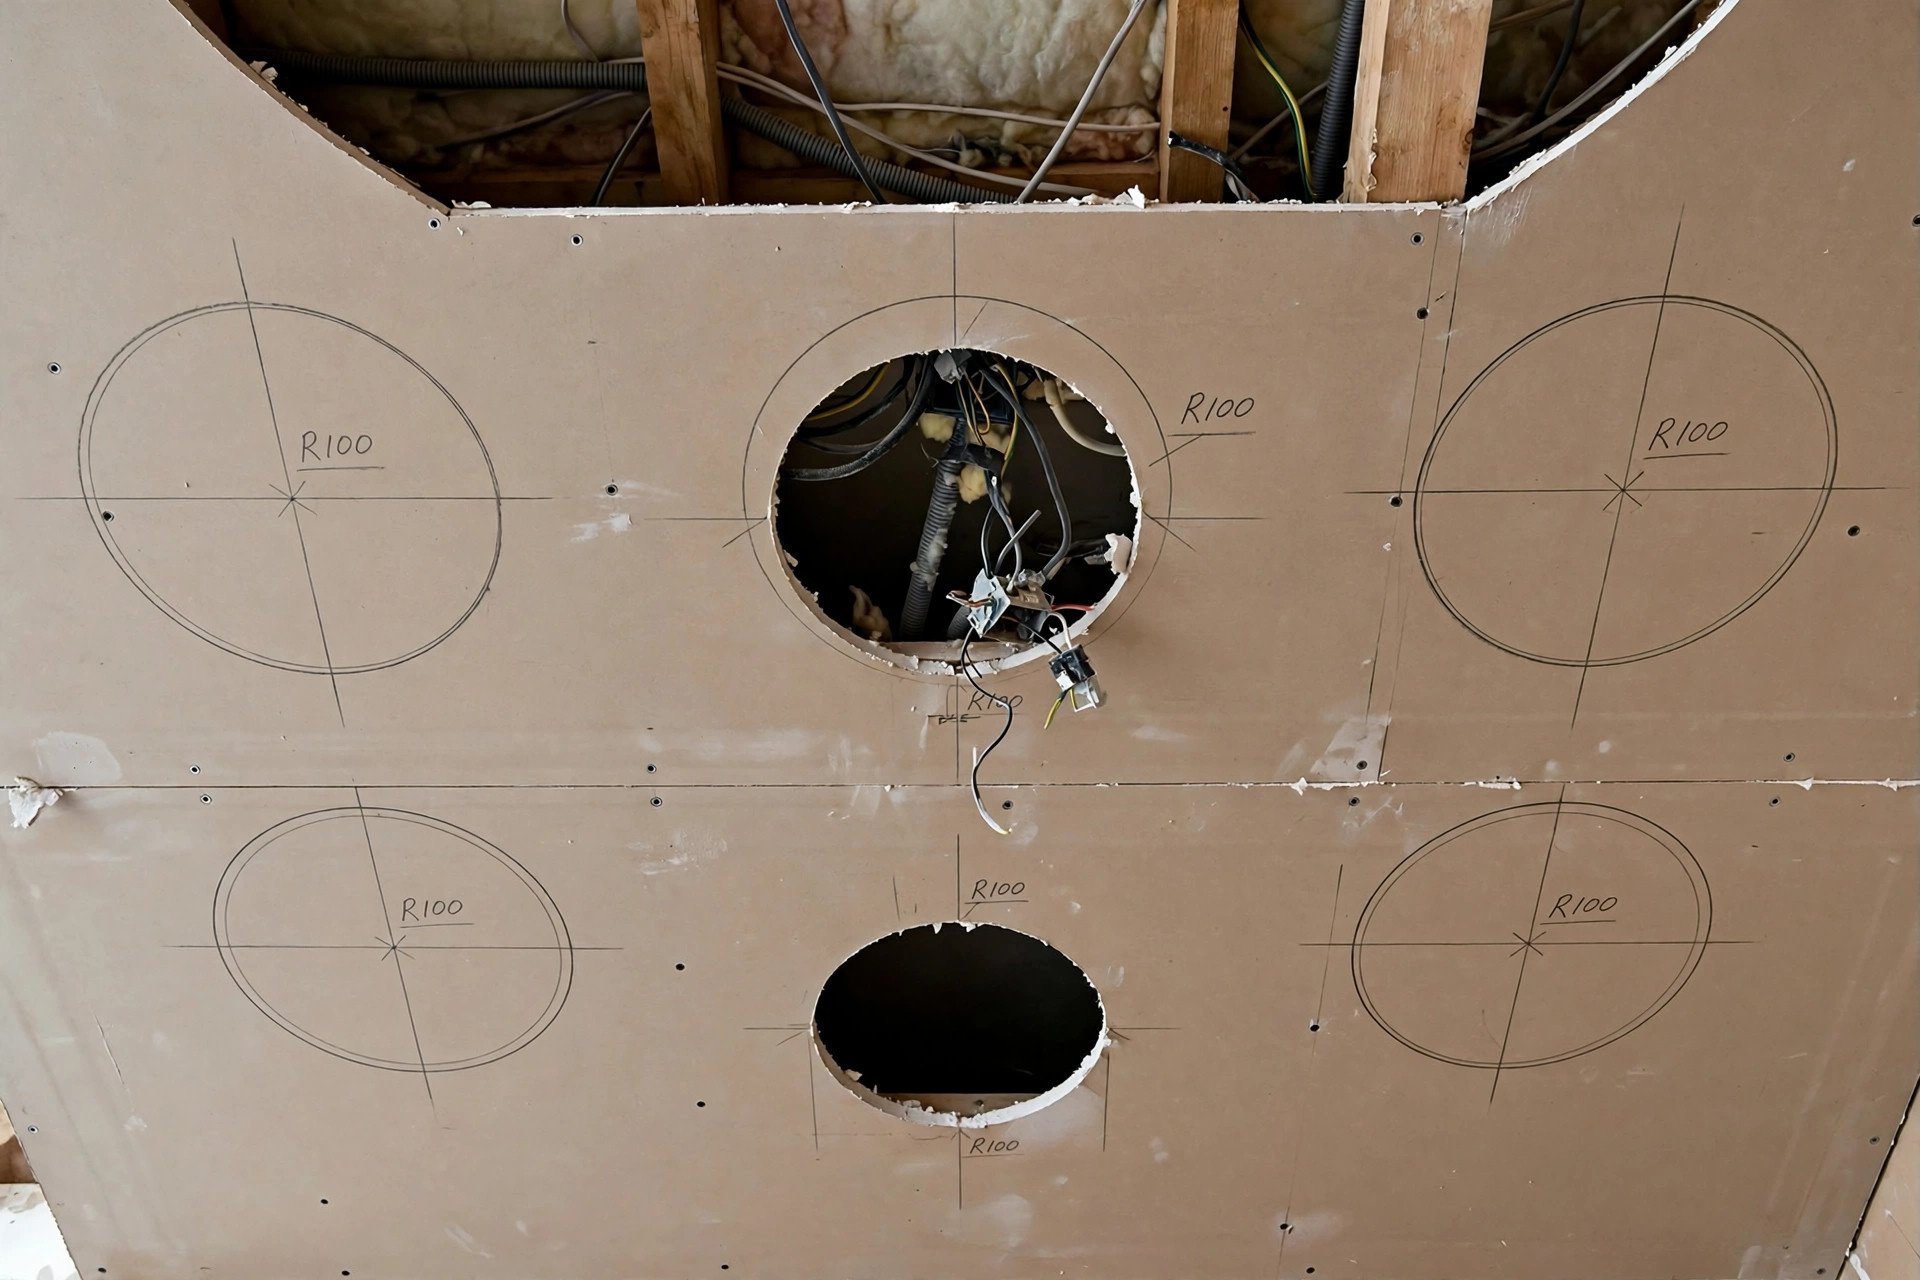
Openings for recessed lights, speakers, AC vents, and access panels are cut to the marked positions — with wiring already in place above, because the lighting plan was fixed in the planning stage. Access panels are fitted now, before finishing, so their frames sit flush and can be painted with the rest of the ceiling.
Stage 8 — Sanding, primer, and paint
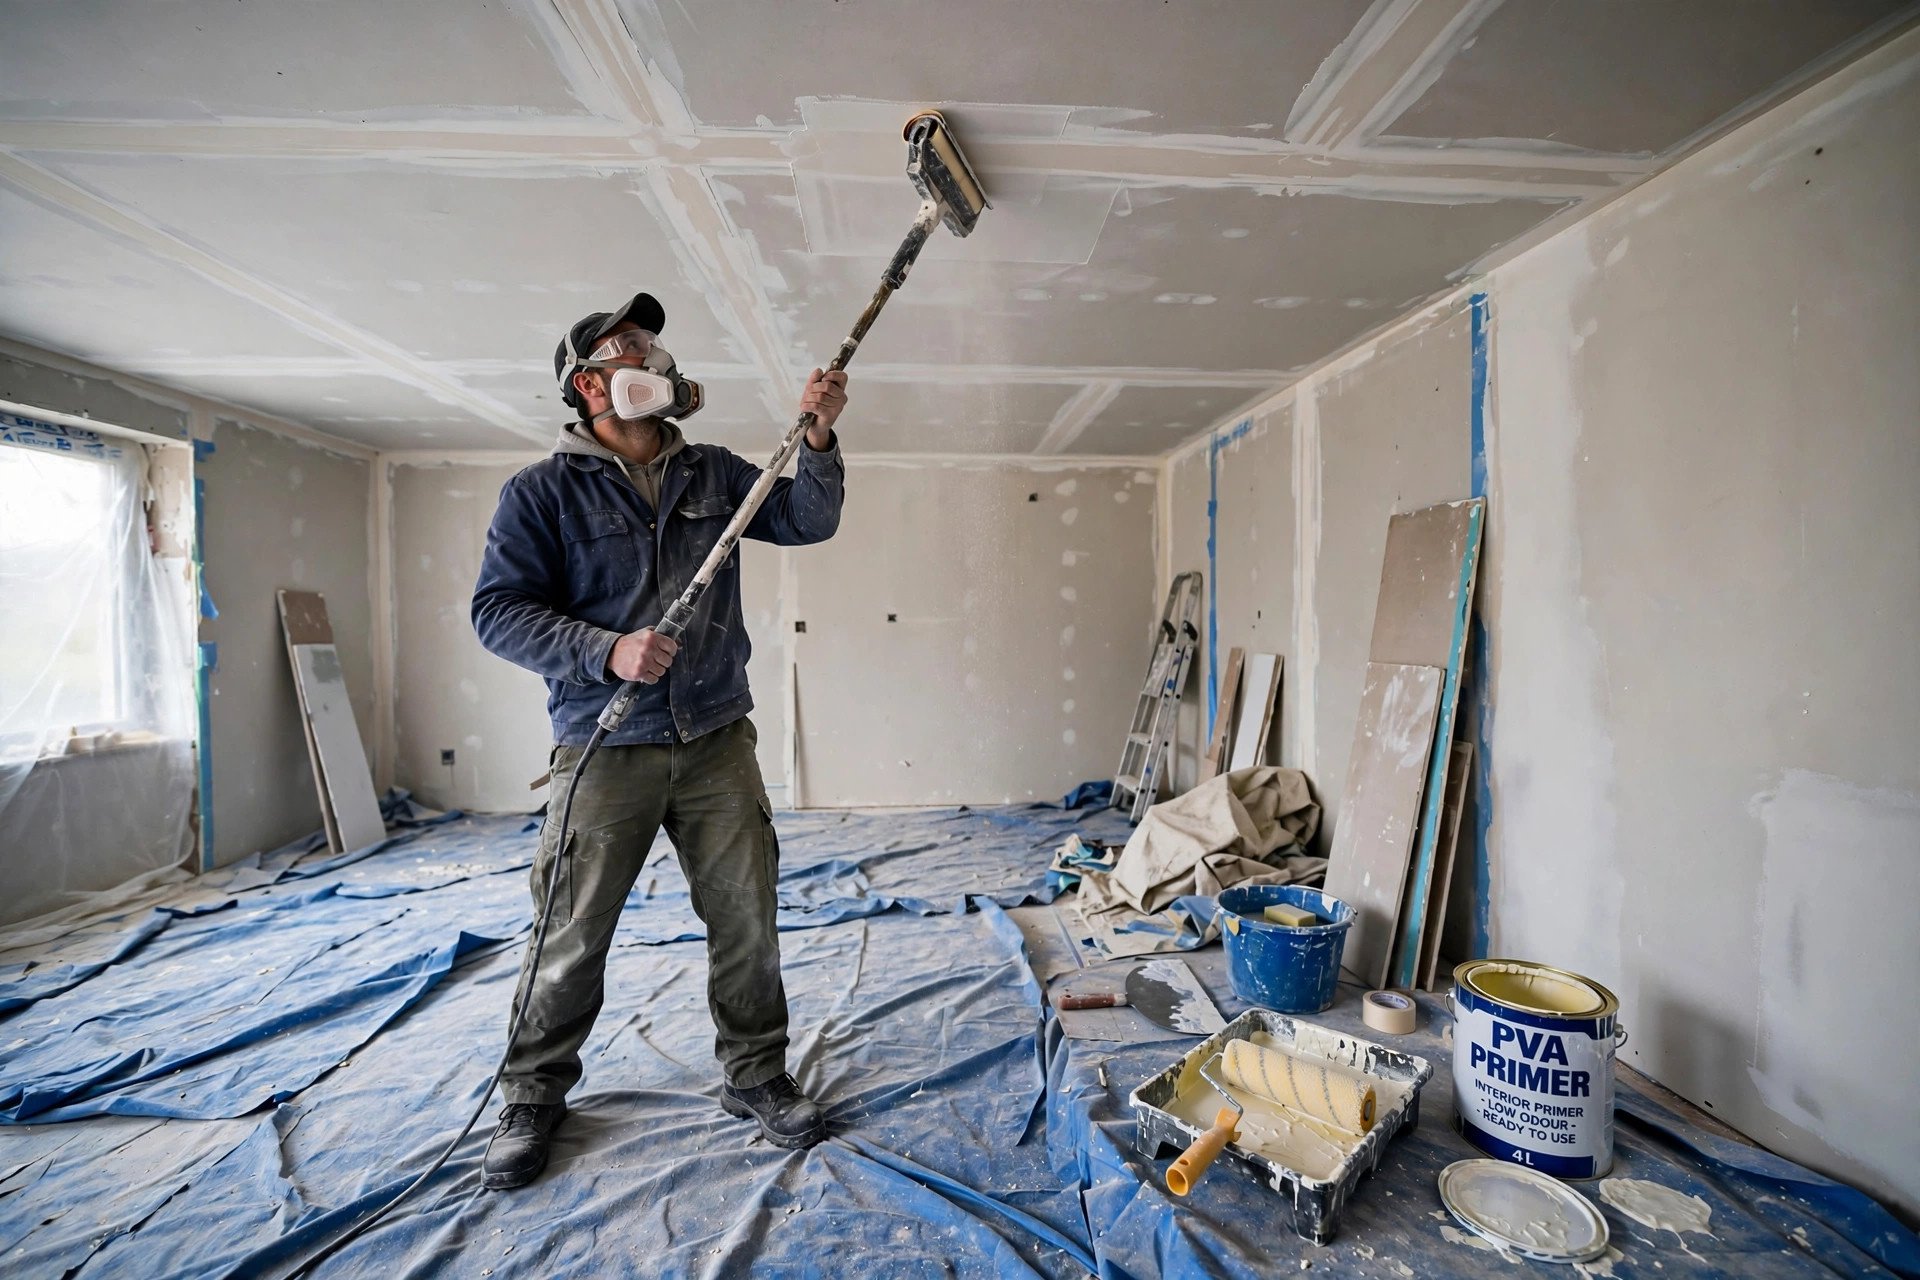
The whole surface is sanded smooth, dusted down, primed, and painted — usually two coats. Primer matters more than people think: it seals the joint compound and board face so the topcoat goes on evenly and the joints do not flash through. Only when the paint is dry is the ceiling truly finished.
How long does it all take?
For a standard bedroom or living room with a straightforward design, guides generally put the timeline at a few working days — commonly two to four. Multi-level designs, large areas, and POP work (which needs on-site drying time) take longer, sometimes up to a week or more. A contractor who promises a complex POP ceiling in a single day is a warning sign, not a bargain.

Where the electrical work fits — and who does it
Every false ceiling hides electrical work: wiring for recessed lights, LED drivers, and sometimes speakers or sensors. Here the division of labour is simple and non-negotiable: the ceiling contractor builds the ceiling, and a licensed electrician handles everything that carries current. All electrical work inside a ceiling — routing wires, making connections, fitting drivers and fixtures — should be done by a licensed electrician, full stop.
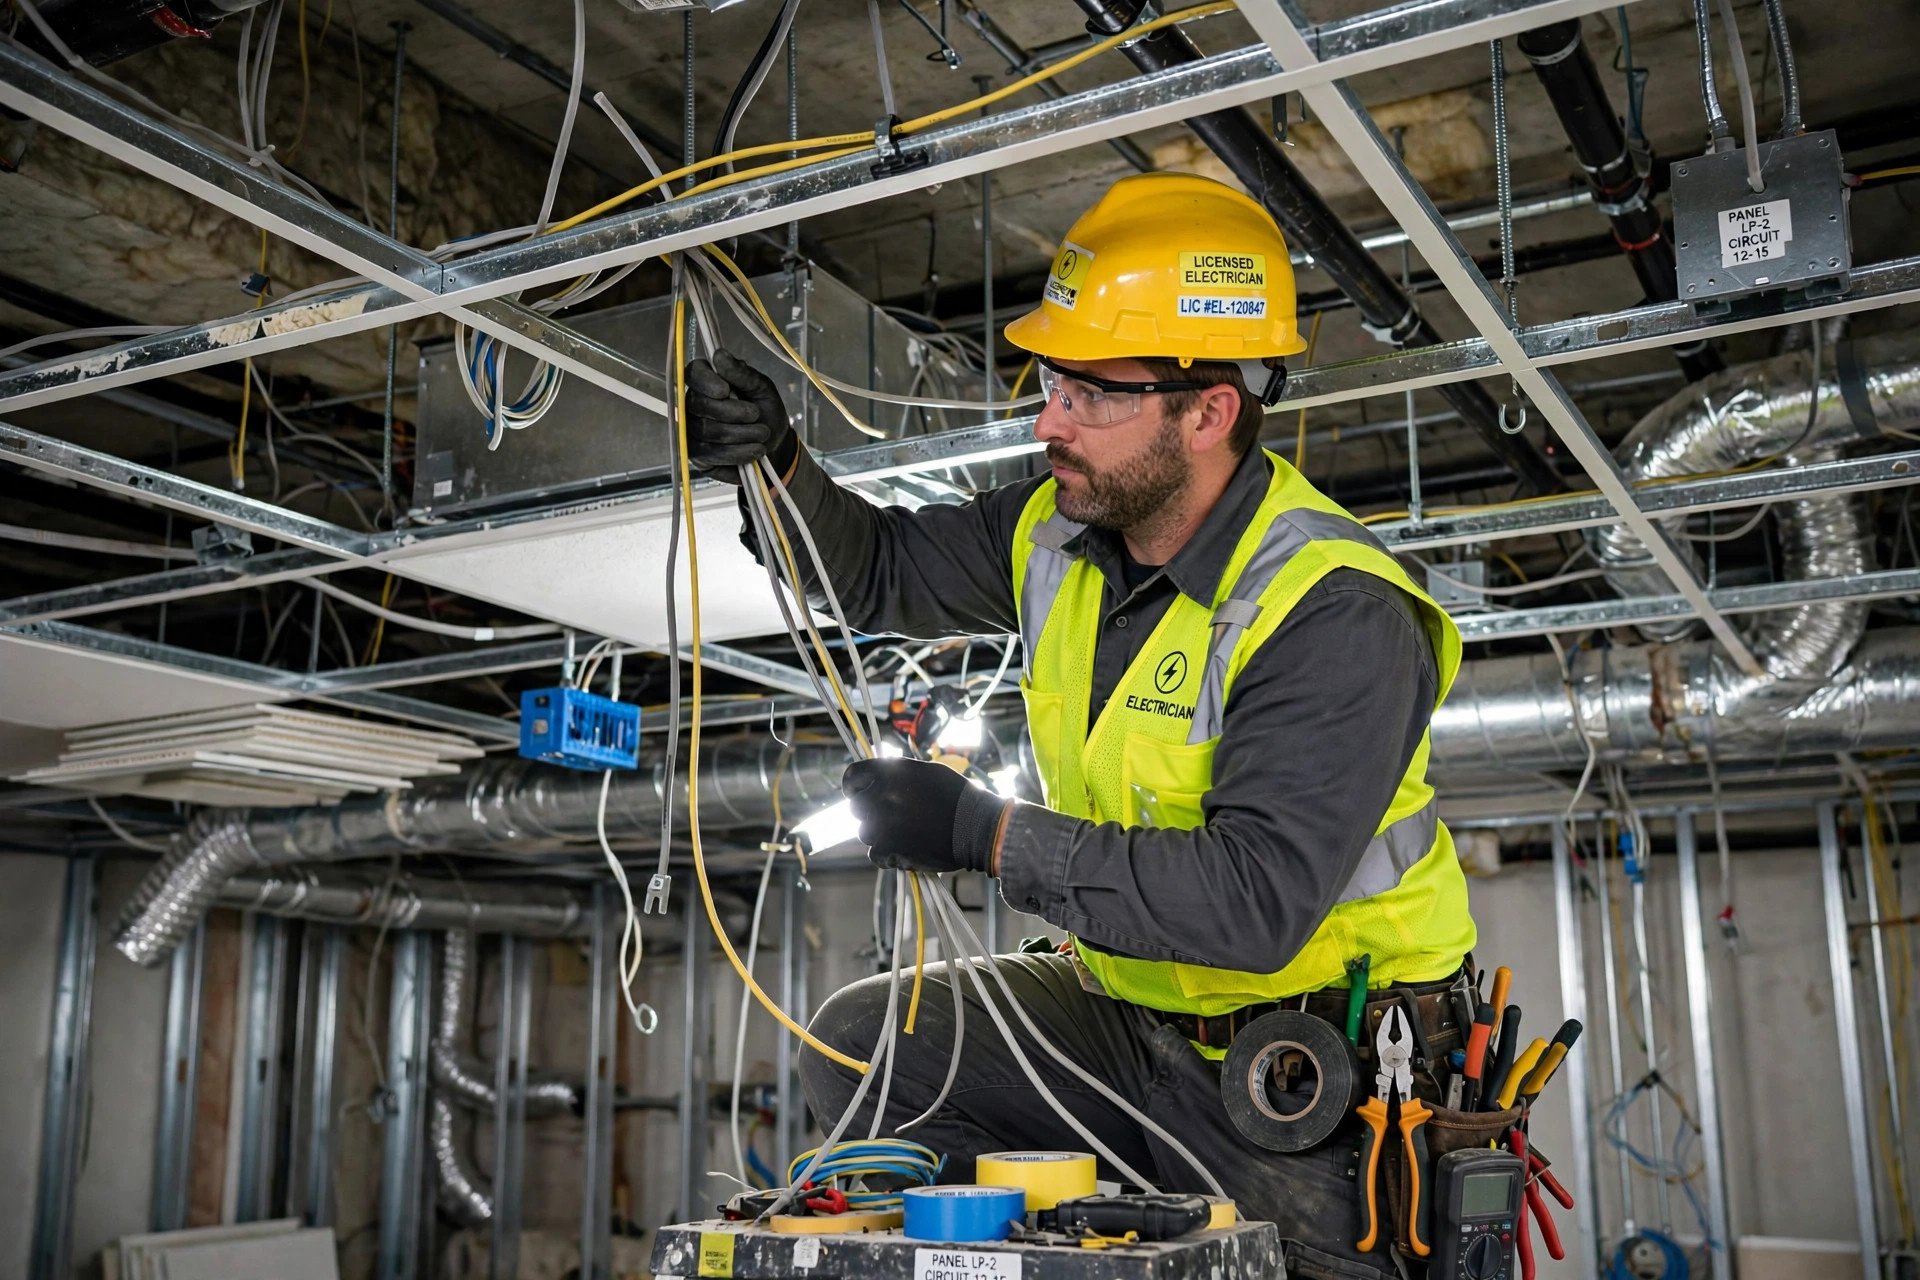
As the homeowner, your job is coordination, not wiring. Make sure the electrician’s work is complete and tested before the boards go up, confirm that every light position on your plan has wiring waiting above it, and ask where the LED drivers are placed — drivers fail more often than the strips themselves, and a driver buried where nobody can reach it turns a ten-minute swap into ceiling surgery.
Fans and heavy fixtures: a word of caution
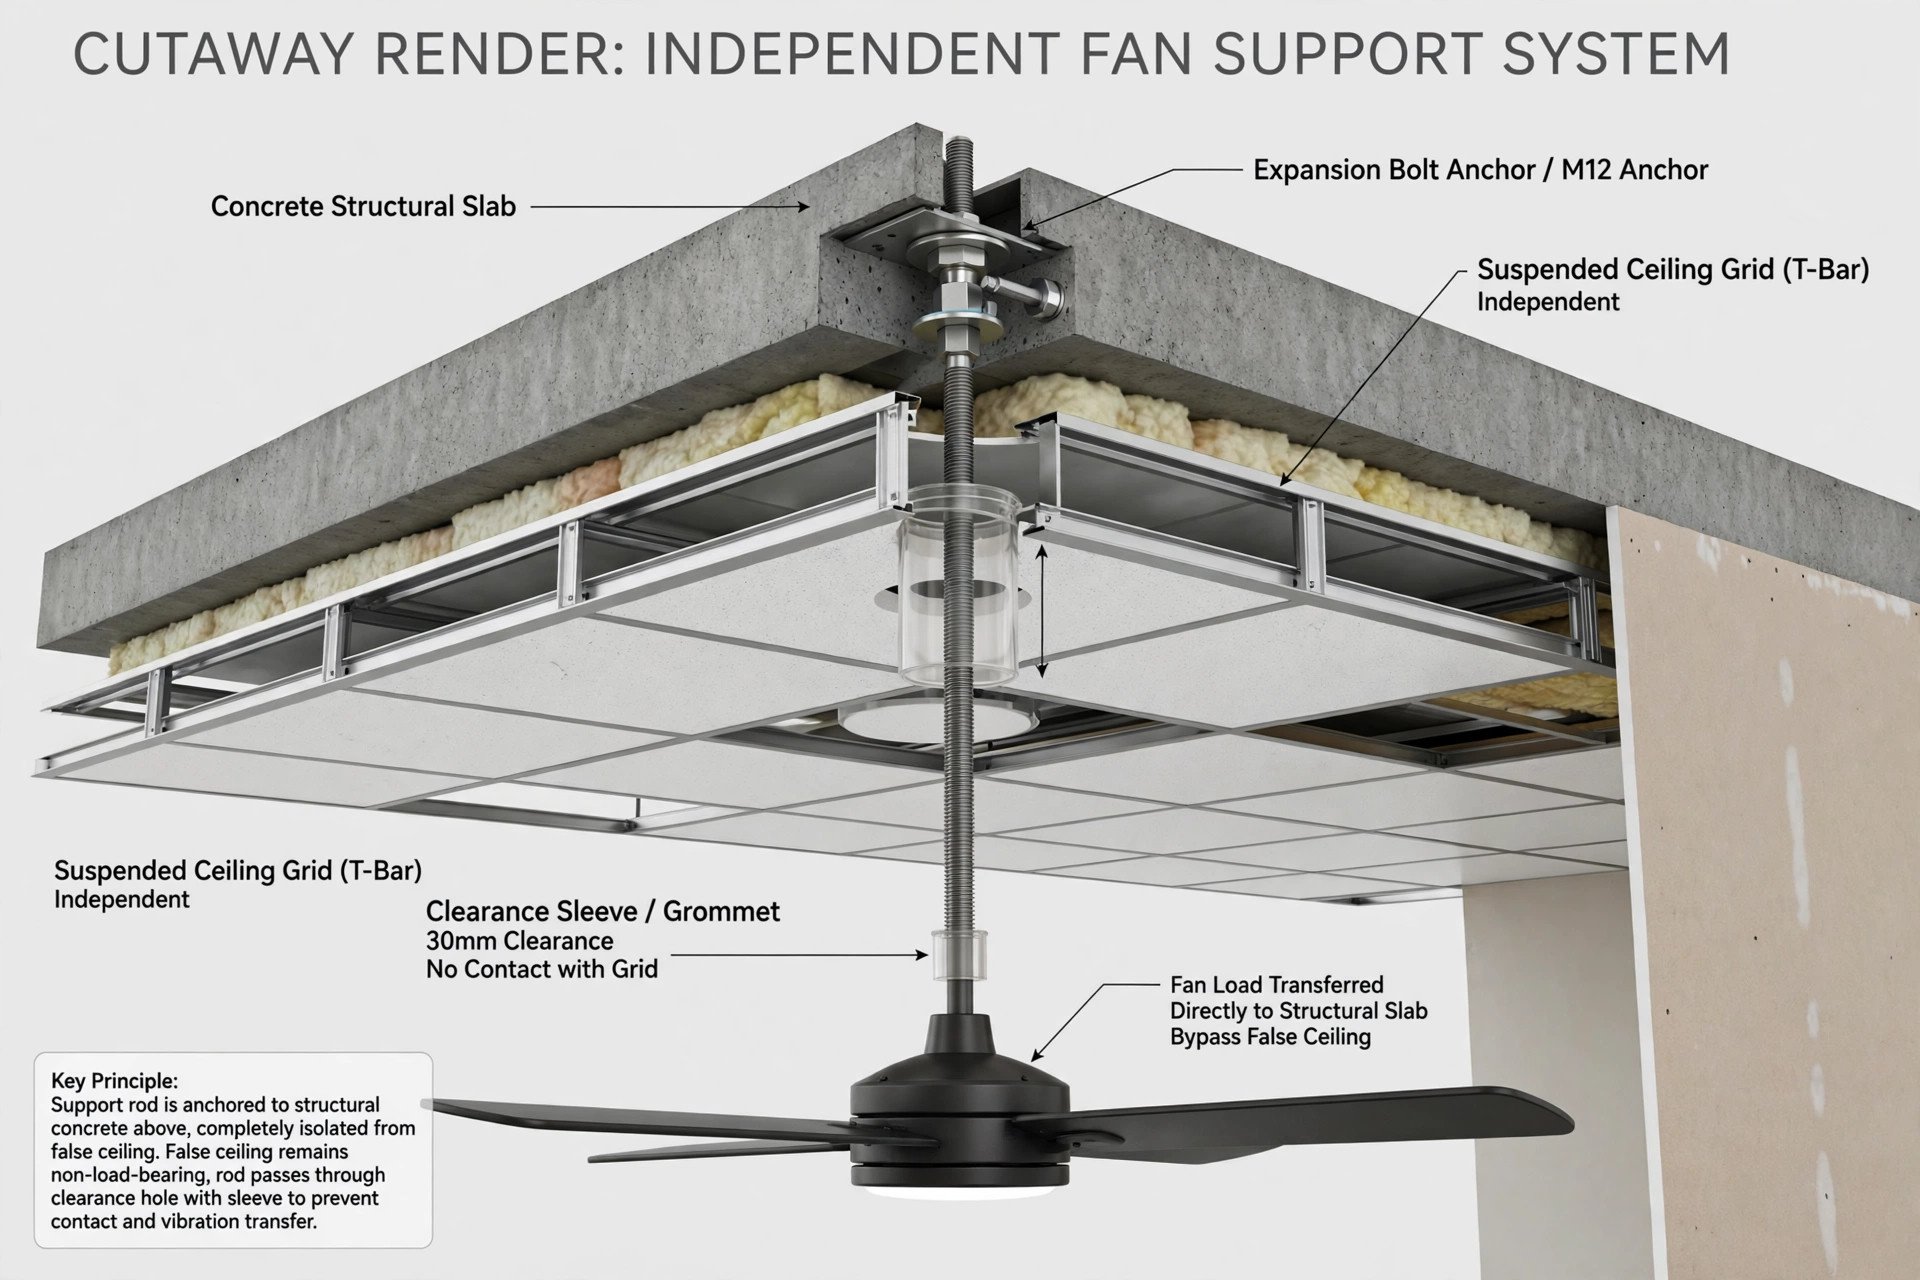
Ceiling fans, chandeliers, and heavy pendants must never hang from the false ceiling framework itself. They need their own independent support anchored to the structural slab above, arranged by your contractor before the ceiling is closed. Do not attempt to hang a fan or chandelier from a false ceiling yourself, and do not let anyone improvise the support after the fact. If your design includes fans, read our guide to false ceiling designs with fans before the framework stage, because the support has to be planned into the structure, not added later.
Access panels: the small door you will thank yourself for
An access panel — also called a trap door or inspection hatch — is a neat, removable section built into the ceiling that gives access to the space above without damaging anything. Its visible face is finished to match the surrounding ceiling, so it blends in. Behind it lie the things you will eventually need to reach: electrical junction boxes, LED drivers, AC drain lines and valves, plumbing connections, and duct dampers.
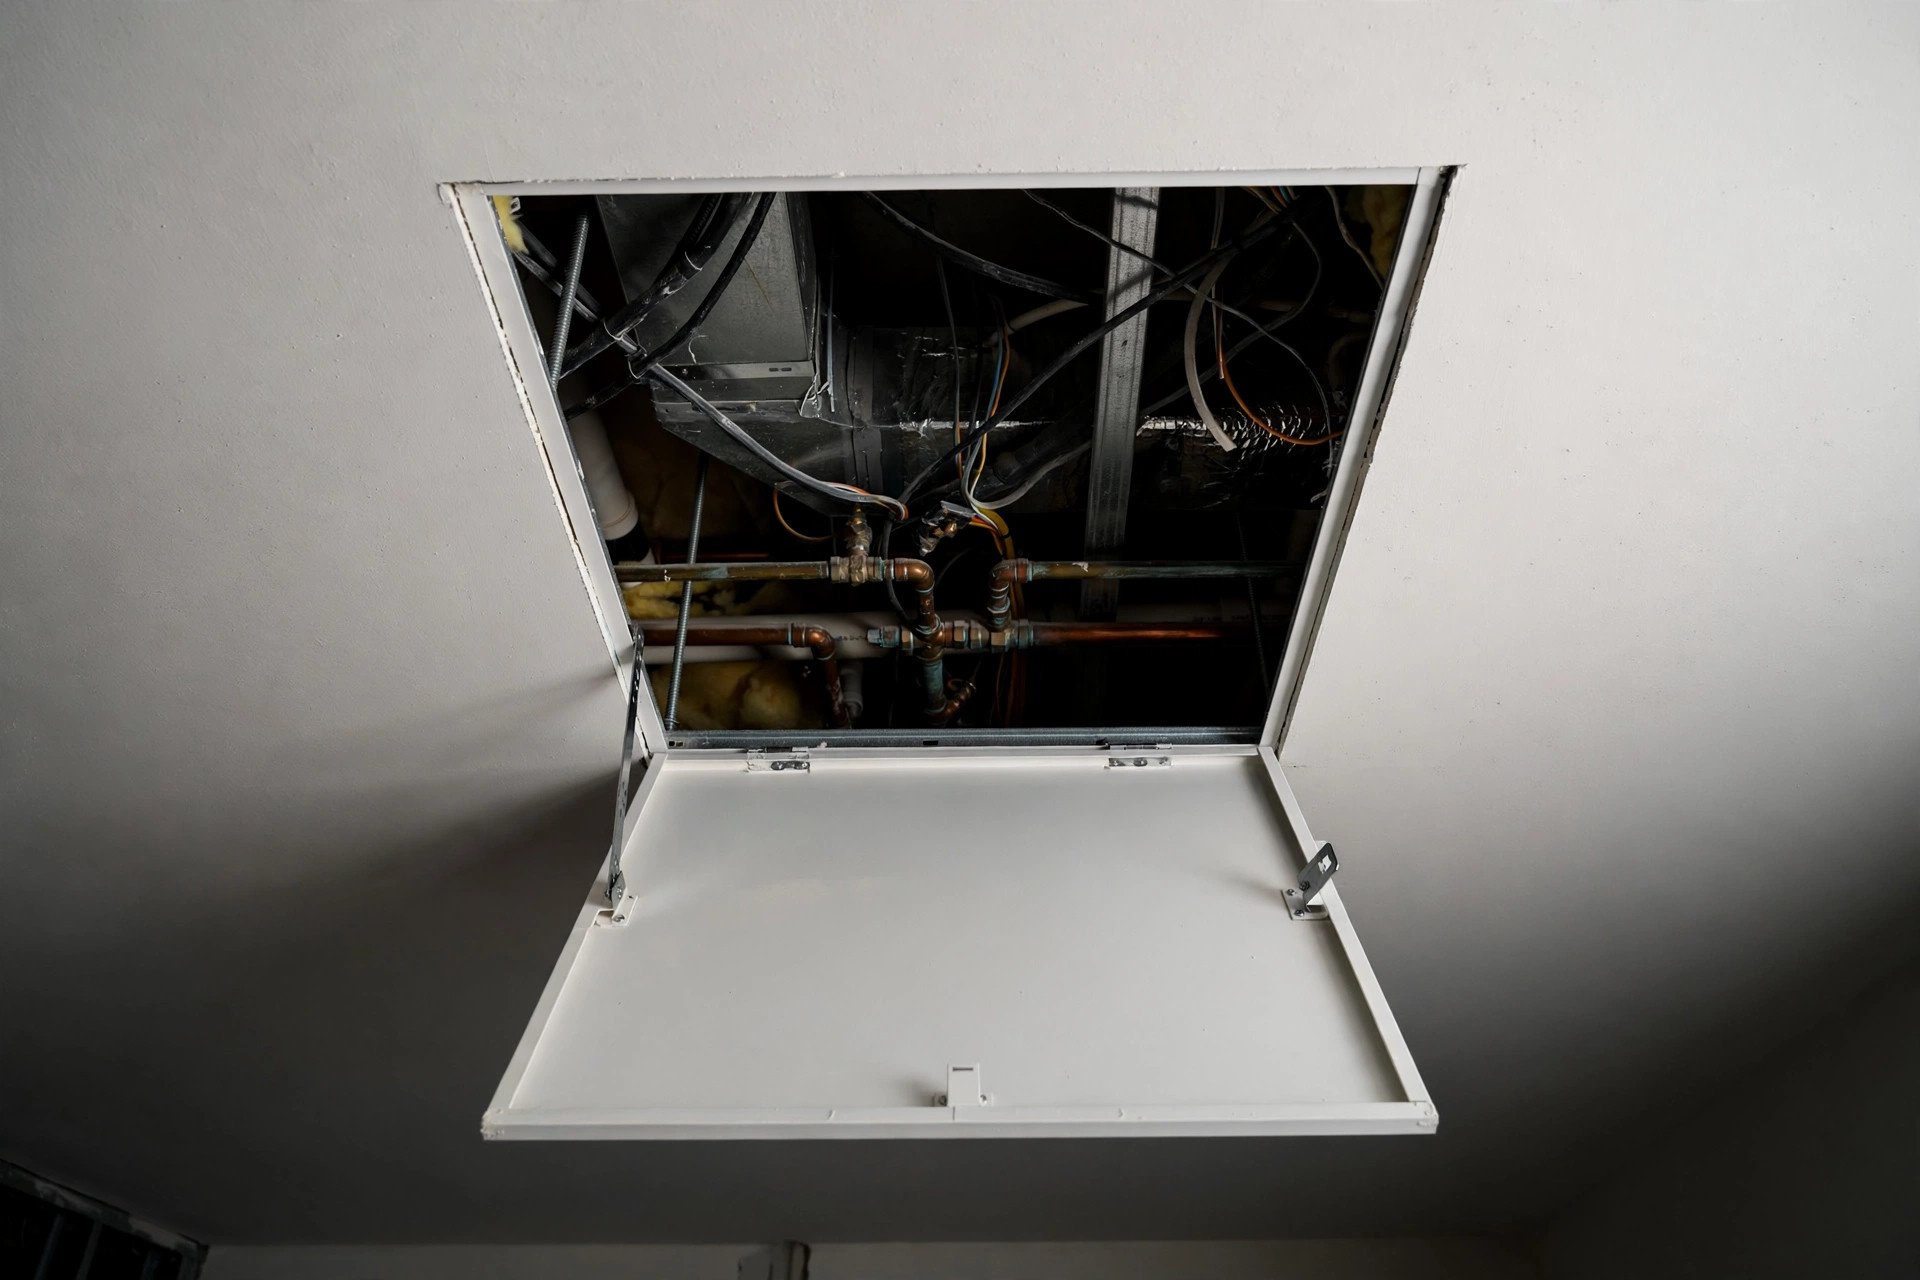
The most repeated advice about access panels is about timing: plan them before the ceiling is installed, near the services likely to need maintenance, and sized for what a technician will actually reach through. Adding a panel later is possible in most cases, but it is cleaner and cheaper as part of the original plan. Without one, the alternative when something goes wrong above the ceiling is cutting a hole in finished work — then patching and repainting it.
Practical placement for a home: one panel near the AC indoor unit’s drain and electrical connections, one near the main wiring junctions, and one wherever plumbing or a valve runs above the ceiling (common in bathrooms). Ask your contractor to mark each panel’s location on the plan and to demonstrate opening it at handover — a panel nobody can find or open is the same as no panel.
Common problems — and how to read them
Most false ceiling problems fall into a few recognisable patterns. Learning to read them tells you whether you are looking at a cosmetic touch-up or something that needs a professional.
Hairline cracks along joints
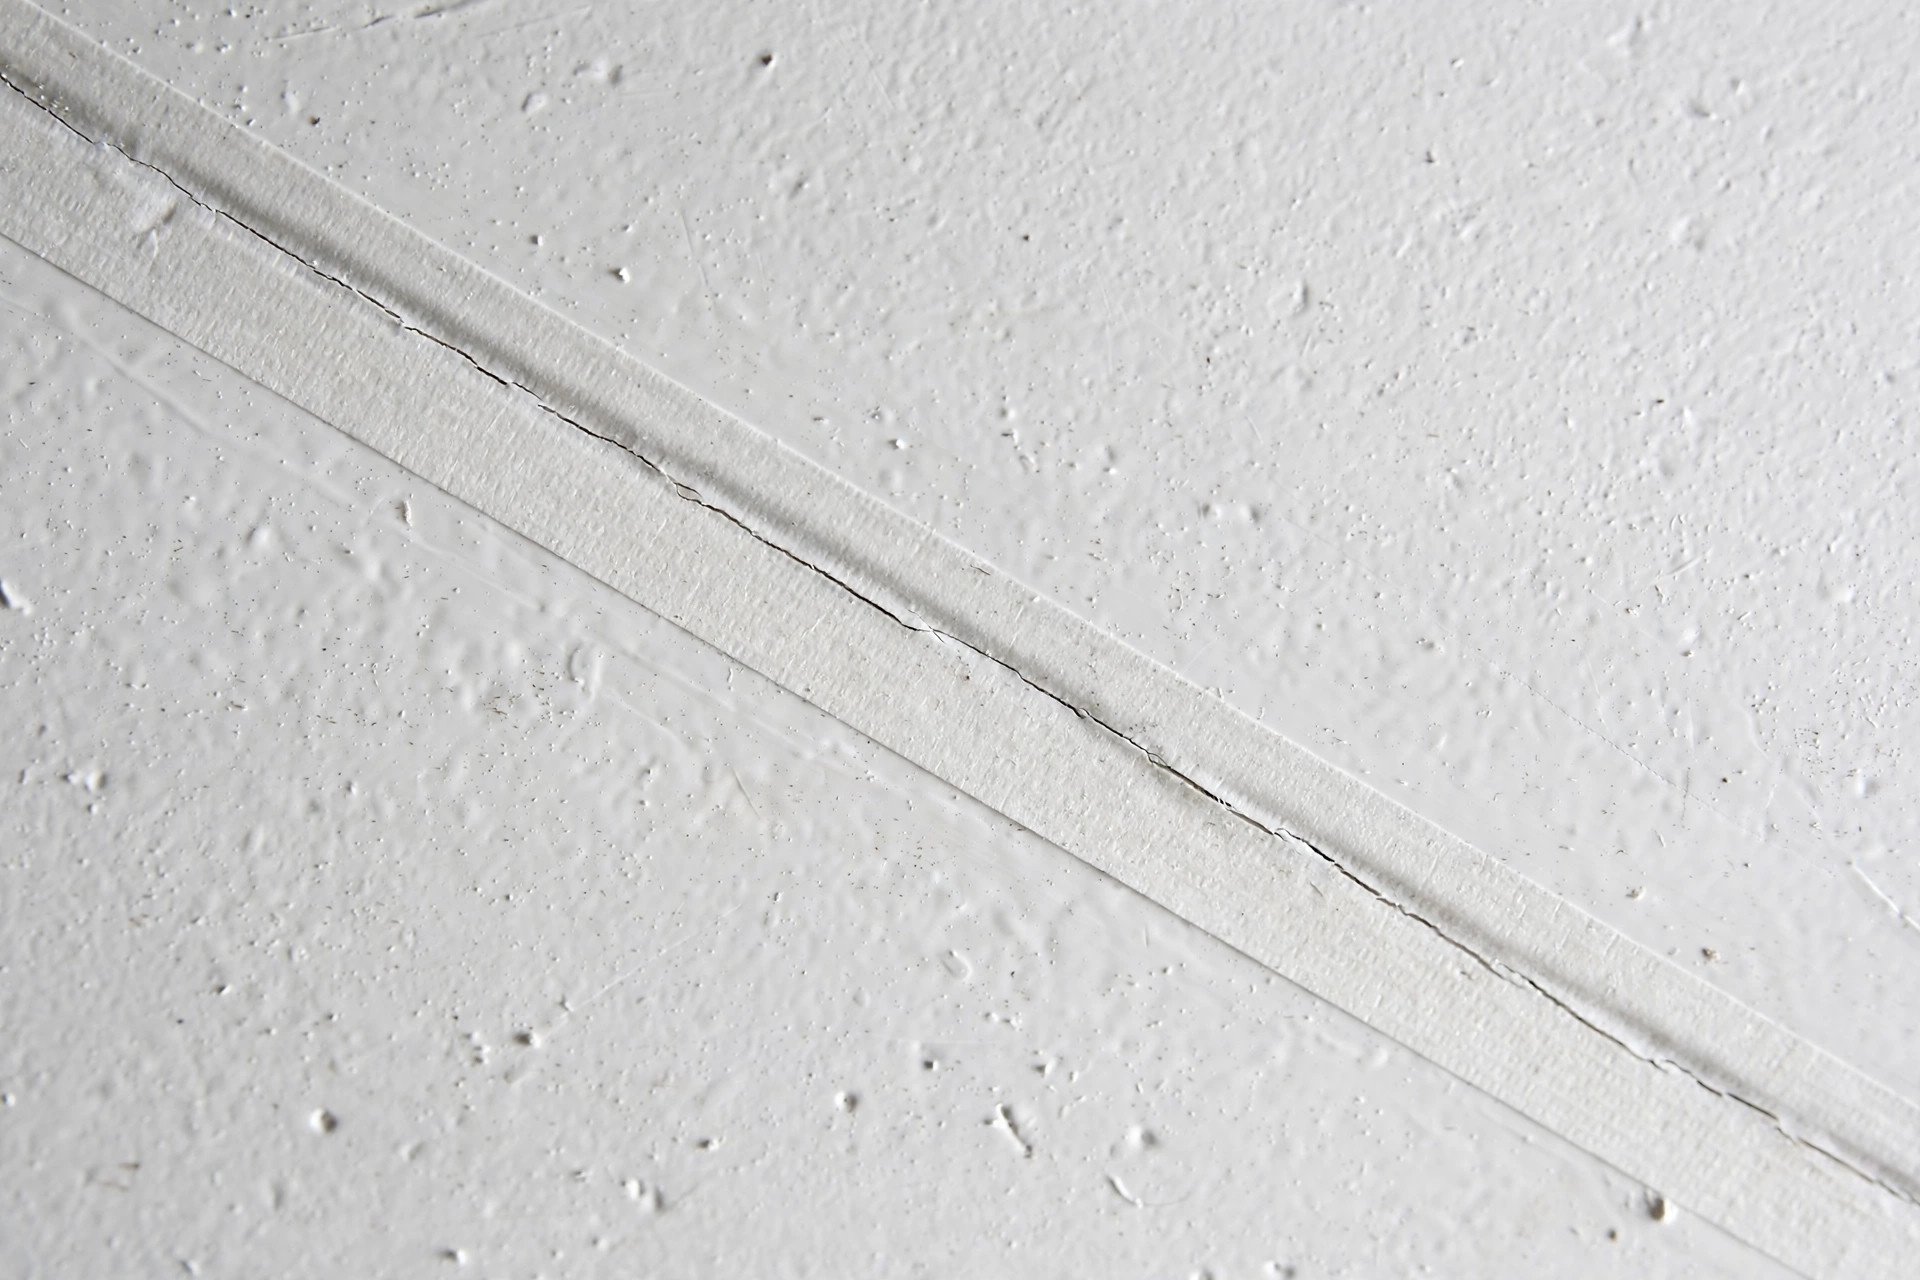
Fine cracks that follow the lines where boards meet are the commonest complaint. They usually come from the building’s natural movement — settling, or expansion and contraction with temperature and humidity changes — working on the joints over time. A thin, stable hairline that does not grow is generally cosmetic; one that keeps widening, or arrives with other symptoms, needs a closer look.
Cracks with stains, damp patches, or peeling paint
When a crack arrives with discolouration, a damp patch, or paint that bubbles and peels, suspect water — from a roof leak above, a plumbing line, or an AC drain pipe. Inspection case studies describe AC drainage leaks above false ceilings going unnoticed until the damage was extensive. The rule here is absolute: find and fix the water source first. Repainting over a stain without fixing the leak just buys you a few months before it comes back.

Sagging or dipping areas
A visible sag or bow needs investigation, not paint. Sagging is associated with moisture damage, loosened fixings, or movement in the framework — and a sag appearing together with a crack is specifically flagged by building guides as a serious sign. Do not try to push it back up yourself.
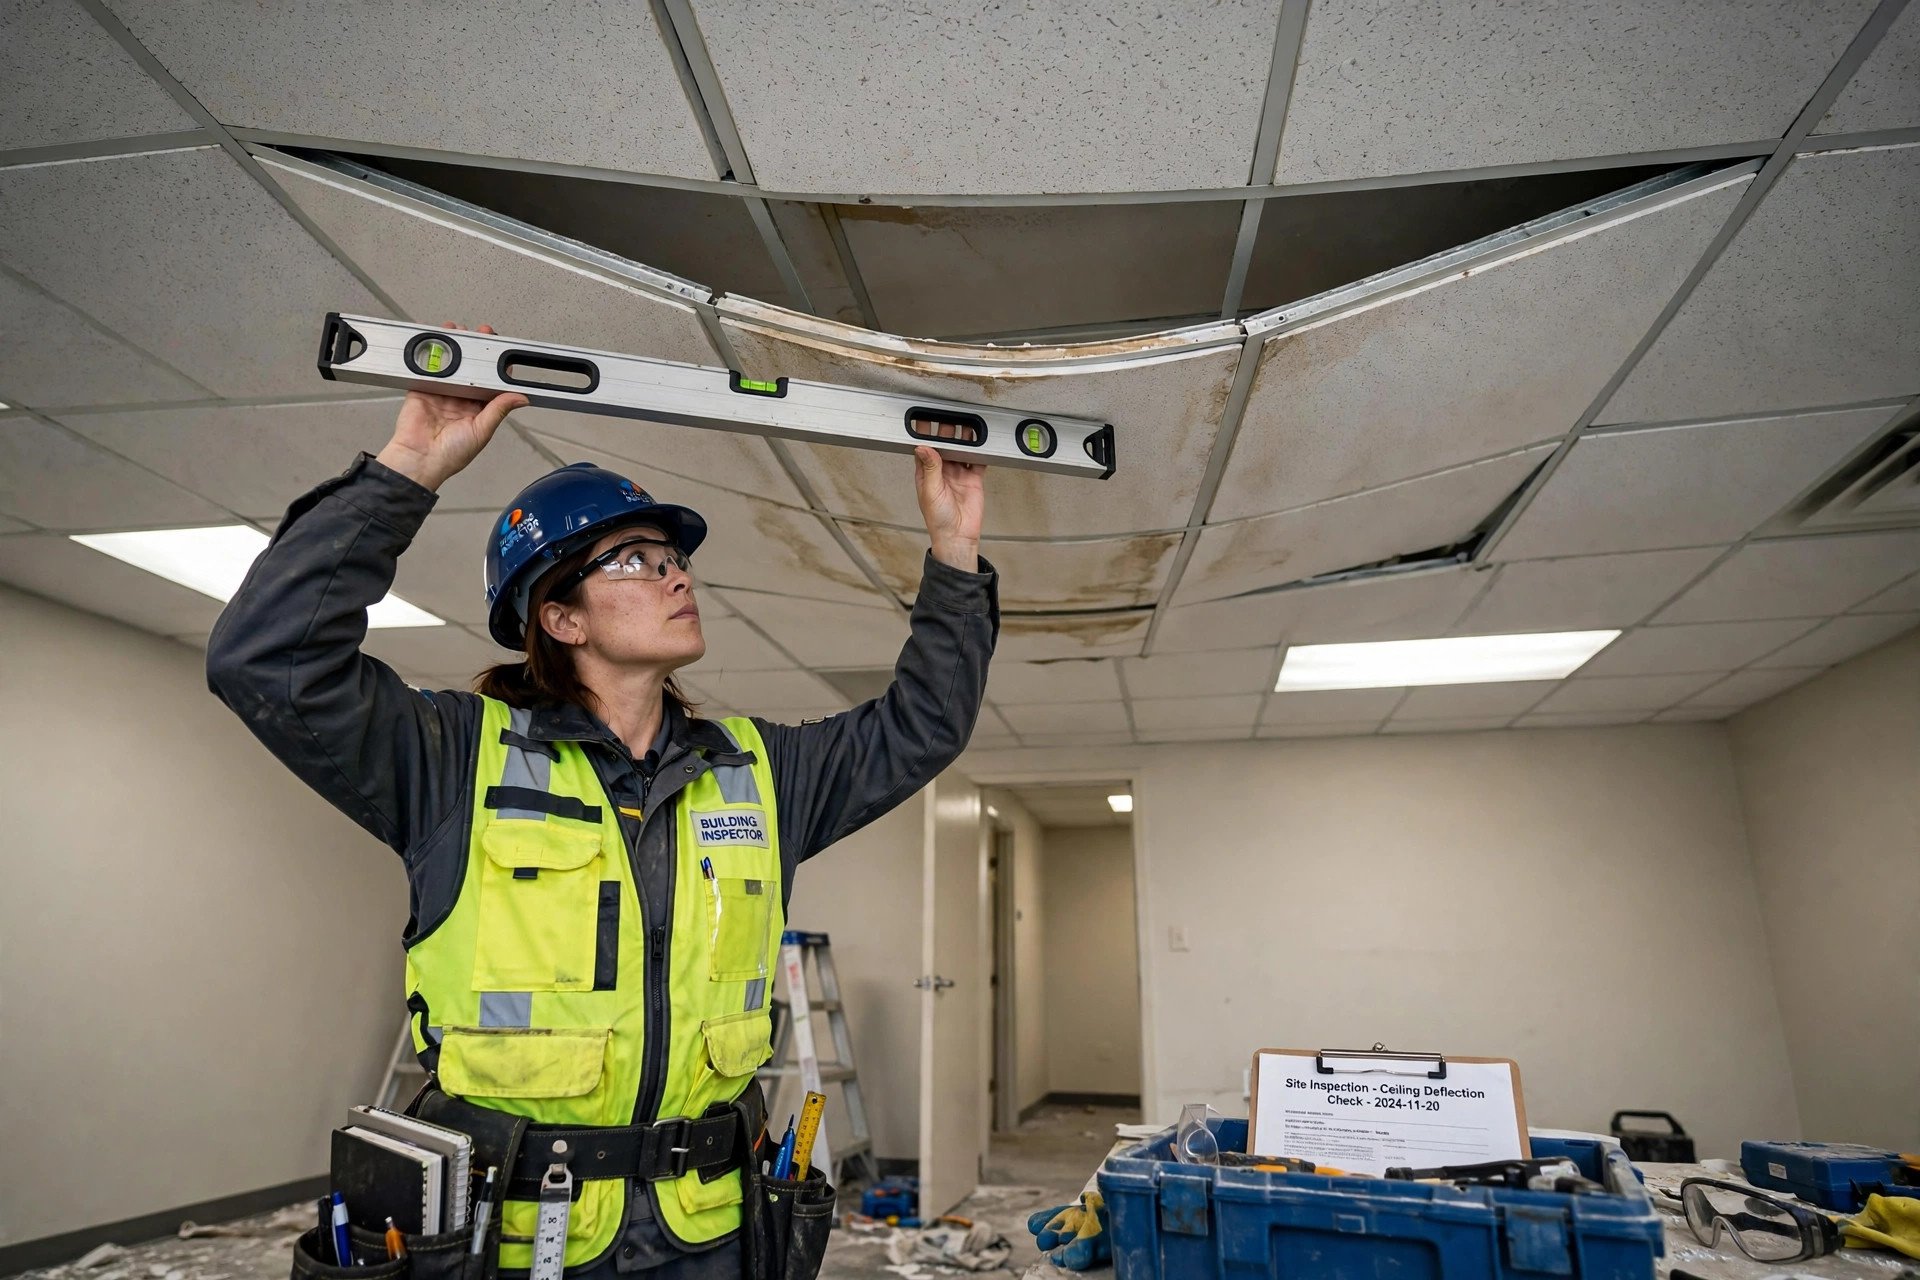
Popping fasteners and loose boards
Screw heads pushing through the paint (“popping”) or boards that feel loose usually point to movement in the framework or fixings working loose. A single pop is minor; several across an area suggest the grid needs professional attention.
Mould, musty smells, and soft boards
Persistent damp can lead to mould — dark spotting and a musty smell — and in gypsum, prolonged wetting softens the board itself. A board that feels soft or spongy is past cosmetic repair and needs replacement. In wet rooms this is often the price of the wrong material: gypsum or wood in a damp bathroom or kitchen absorbs moisture and deteriorates, where PVC or metal systems would have held up.
How repairs are actually done
Every sound repair follows the same order: diagnose, fix the cause, then fix the surface. Skipping the first two steps is why so many ceiling repairs fail within a year.
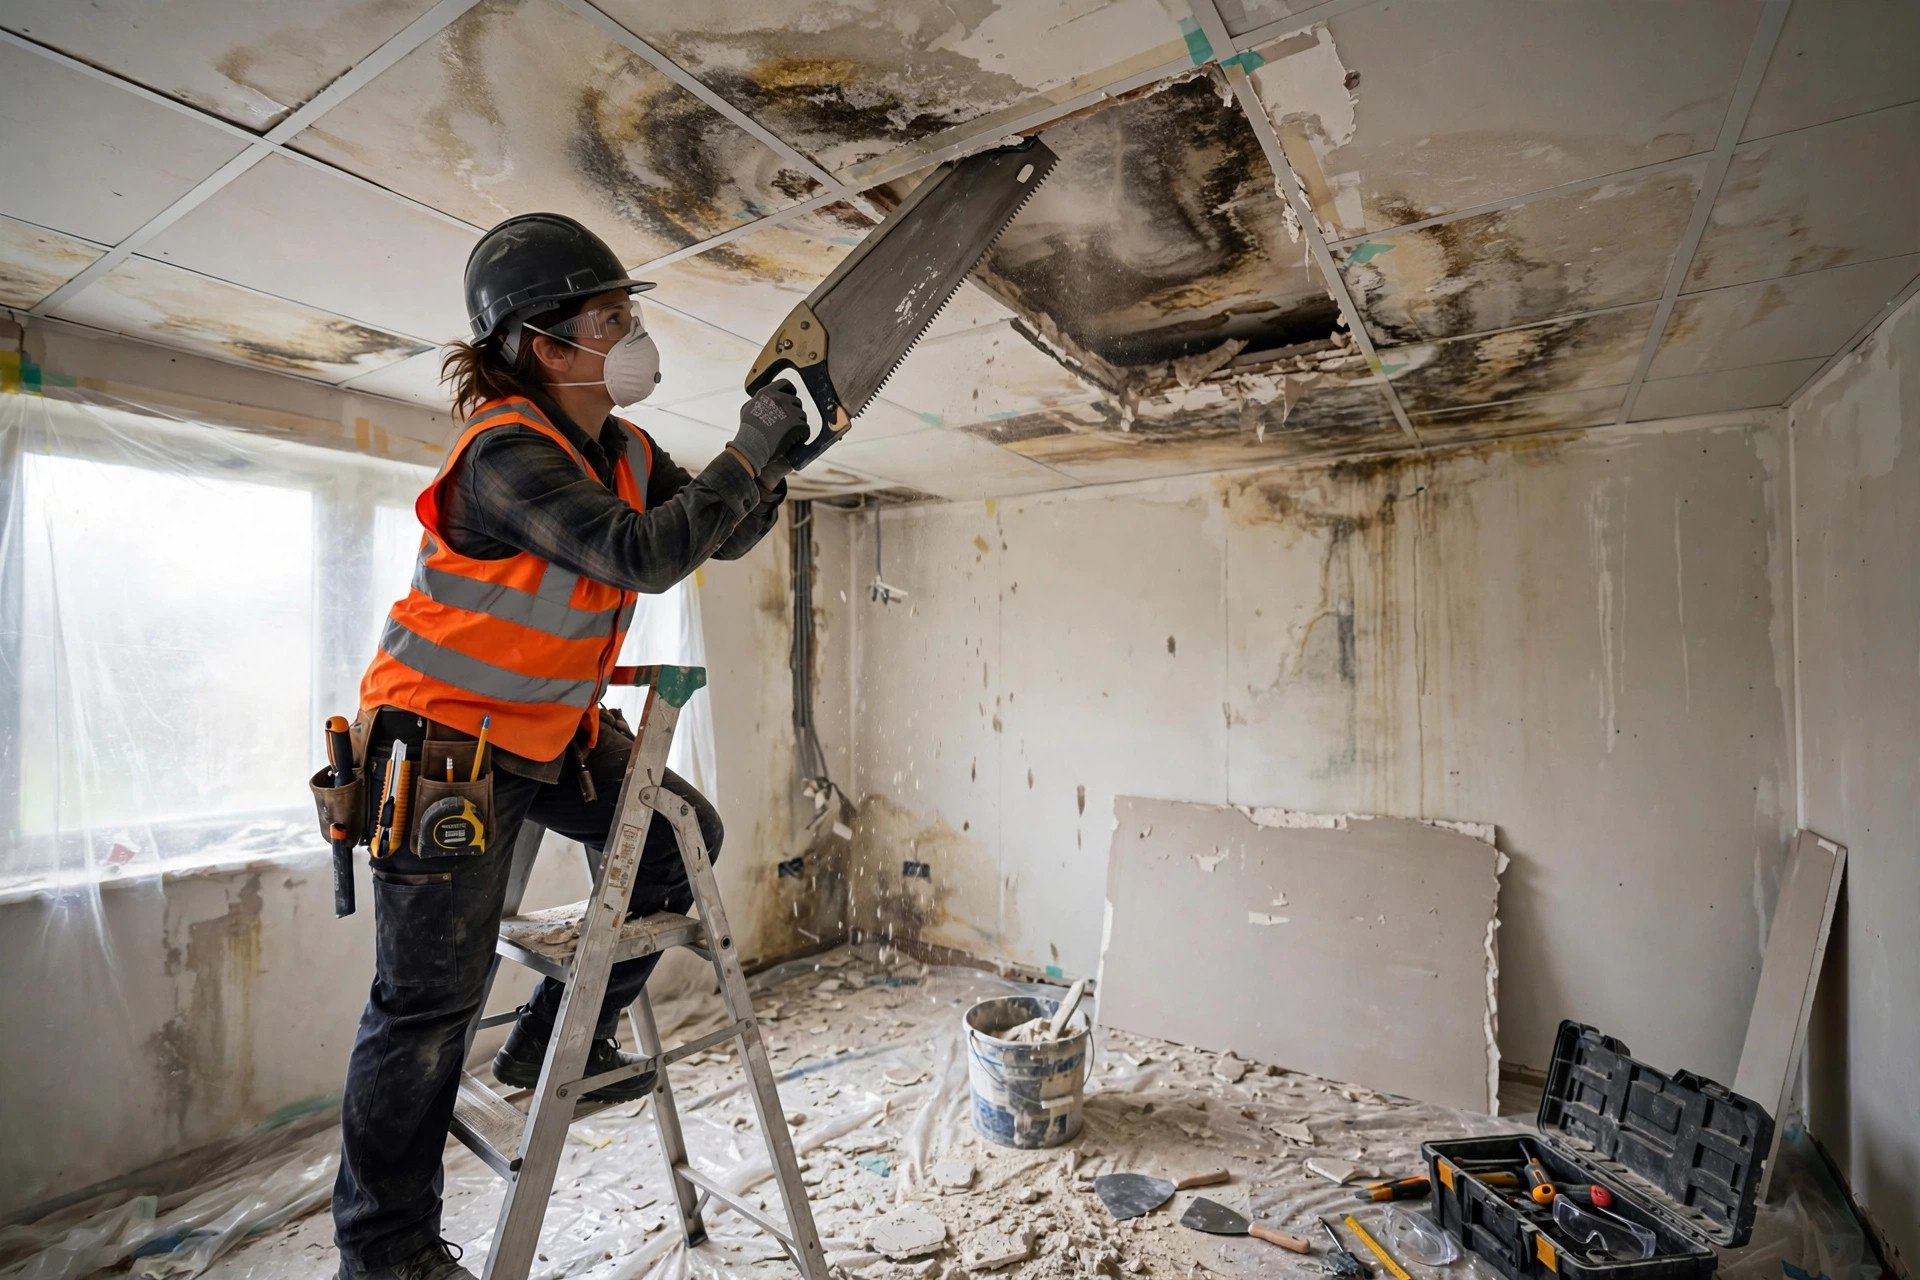
Step 1 — Find the cause
For cracks, check whether they are growing: mark the ends with pencil and look again in a few weeks. For stains, trace the water — the roof or terrace above, plumbing lines, AC drains — and inspect during or just after rain if the leak is rain-related. For sagging, the framework needs a professional look before anything cosmetic happens. If you have access panels, use them: a look into the ceiling void often reveals the story immediately.
Step 2 — Fix the cause first
A roof leak needs roof waterproofing, not ceiling paint. A leaking pipe needs a plumber; an overflowing AC drain needs the drain cleared. The moisture source must be stopped and the area fully dried before any ceiling repair begins — patching a wet ceiling traps the moisture and guarantees a repeat.
Step 3 — Repair the surface
What happens next depends on the damage. A small, dry, stable hairline crack or a popped screw is the kind of minor cosmetic work a careful homeowner can patch, fill, sand, and touch up. Anything beyond that — recurring or wide cracks, stains that return, sagging, soft or crumbling boards, damage near electrical fittings — belongs to a professional. Severely damaged board is cut out and replaced, joints re-taped, and the area primed (a stain-blocking primer for water marks) and repainted to match. The goal is to restore an even, level surface, not just to close the hole.
A note on active leaks
If water is actively dripping, or there is sagging, bubbling paint, or water near a light fixture, treat it as urgent: move belongings away, place a container under the drip, do not touch weakened material, and switch off the relevant power circuit if wiring may be affected. Then get the leak stopped and the area dried before any repair is discussed.
Cleaning and maintenance schedule
A false ceiling asks for very little — but “very little” is not “nothing.” A simple routine keeps small issues from becoming repairs.

Every few months
Dust with a soft dry cloth, a microfibre duster, or a vacuum with a brush attachment. Pay attention to cove light troughs and decorative grooves, where dust settles out of sight. PVC ceilings can simply be wiped with a damp cloth. Keep water away from gypsum and wood surfaces — damp-mopping a gypsum ceiling is asking for trouble.
Once a year
Walk each room and look for new cracks, stains, damp patches, sagging, or peeling paint — especially around light fittings and AC vents. Open the access panels and look into the void with a torch for signs of leaks or disconnected ducts. Test cove and strip lighting and replace failed LED strips or drivers, which are often reachable through the access panels.
Before and after the monsoon
In India, the monsoon is the stress test. Before the rains, check the roof waterproofing and clear terrace drains — a blocked drain that ponds water above your ceiling is a classic source of damage. After the rains, look for any new stains or damp patches and deal with the source immediately rather than painting over it.
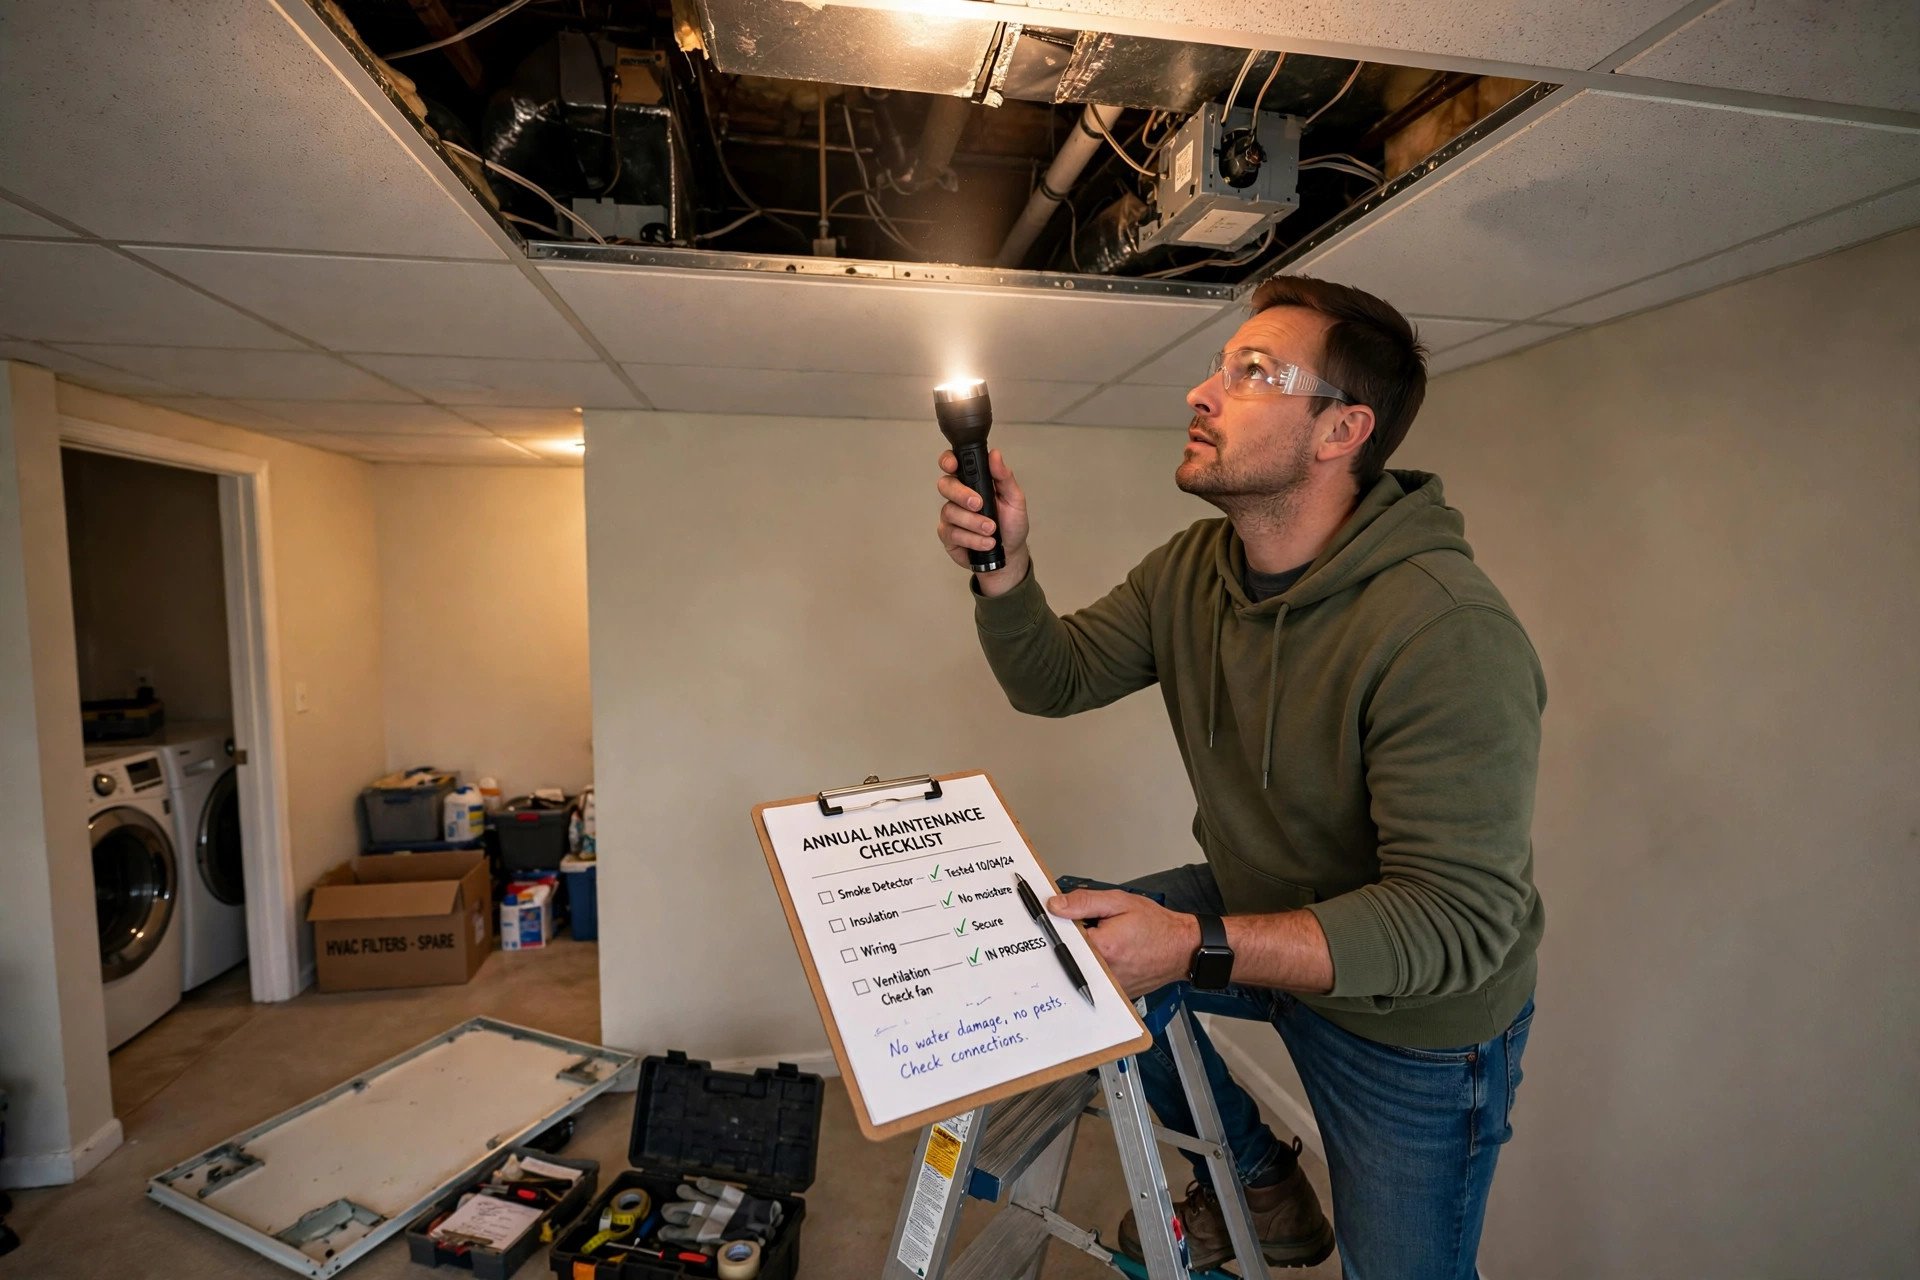
Repainting
Repaint when the finish looks dull, discoloured, or marked — there is no fixed calendar, though many homeowners refresh every several years. Always fix the underlying cause of any stain before repainting, and prime repaired areas so patches do not show through the new coat.
When to call a professional
Call a qualified ceiling contractor or relevant specialist — plumber for leaks, electrician for anything involving wiring — when you see any of these:
- A ceiling section that is sagging, bowing, or feels soft or spongy.
- Cracks that keep widening, run diagonally, appear in clusters, or extend from the ceiling down a wall.
- Any active water leak, especially near light fixtures or wiring.
- Stains that return after repainting, or a persistent musty smell suggesting hidden damp or mould.
- Loose boards, multiple popped fasteners, or visible movement in the framework.
- Any problem inside the ceiling void you cannot identify — if you do not know what you are looking at above the ceiling, that is precisely when to stop and call someone who does.
When you do call, share the history: when the problem started, whether it is growing, what the monsoon did to it, and where your access panels are. A clear history gets you a faster, more accurate diagnosis.
Frequently asked questions
How long does false ceiling installation take?
For a standard bedroom or living room with a straightforward design, guides generally indicate a few working days — commonly two to four. Multi-level designs, large areas, and POP work (which needs on-site drying time) take longer. Rushing the jointing and drying stages is a common cause of later cracks, so a realistic timeline is a sign of a good contractor, not a slow one.
Can an access panel be added to a ceiling that is already finished?
In most cases, yes — a panel can be retrofitted into an existing ceiling. But it is cleaner, cheaper, and better-looking when planned during the original installation, positioned near the services it serves. If your finished ceiling has no panels at all, ask a contractor about adding at least one near the AC connections and wiring junctions.
Can I just paint over a water stain on the ceiling?
Only after the moisture source is found and fixed, and the area is fully dry. Painting over an unresolved leak hides the symptom while the damage continues above — the stain will return, and the board may soften in the meantime. Fix the cause, dry it out, then prime with a stain-blocking primer and repaint.
Which parts of ceiling work can I do myself?
Routine dusting, visual inspections, and opening your access panels to look inside are all sensible homeowner tasks. Minor cosmetic touch-ups — a small stable hairline crack, a popped screw — are within a careful DIYer’s reach. Everything structural (framework, board replacement, sagging), everything involving water ingress, and absolutely all electrical work belongs to qualified professionals.
Do I need to worry about the weight of lights and decorations on the ceiling?
Standard recessed lights and LED strips are part of what the framework is designed to carry, which is why the lighting plan is fixed before installation. Anything heavier — chandeliers, large pendants, and especially fans — needs its own independent support from the structural slab, arranged by your contractor. Never hang heavy items from the ceiling boards or framework yourself.
A note on the images in this guide
All visuals in this article are original concept renders and illustrations created for falseceiling.in — they show typical installation stages, framework details, and maintenance situations as clearly as possible. They are not photographs of completed projects, and the framework diagram carries labels only; no structural specifications are shown or implied, since sizing and engineering are decisions for your contractor on site.